Monday, February 28, 2011

Old (Factory?) Tool & Drawing

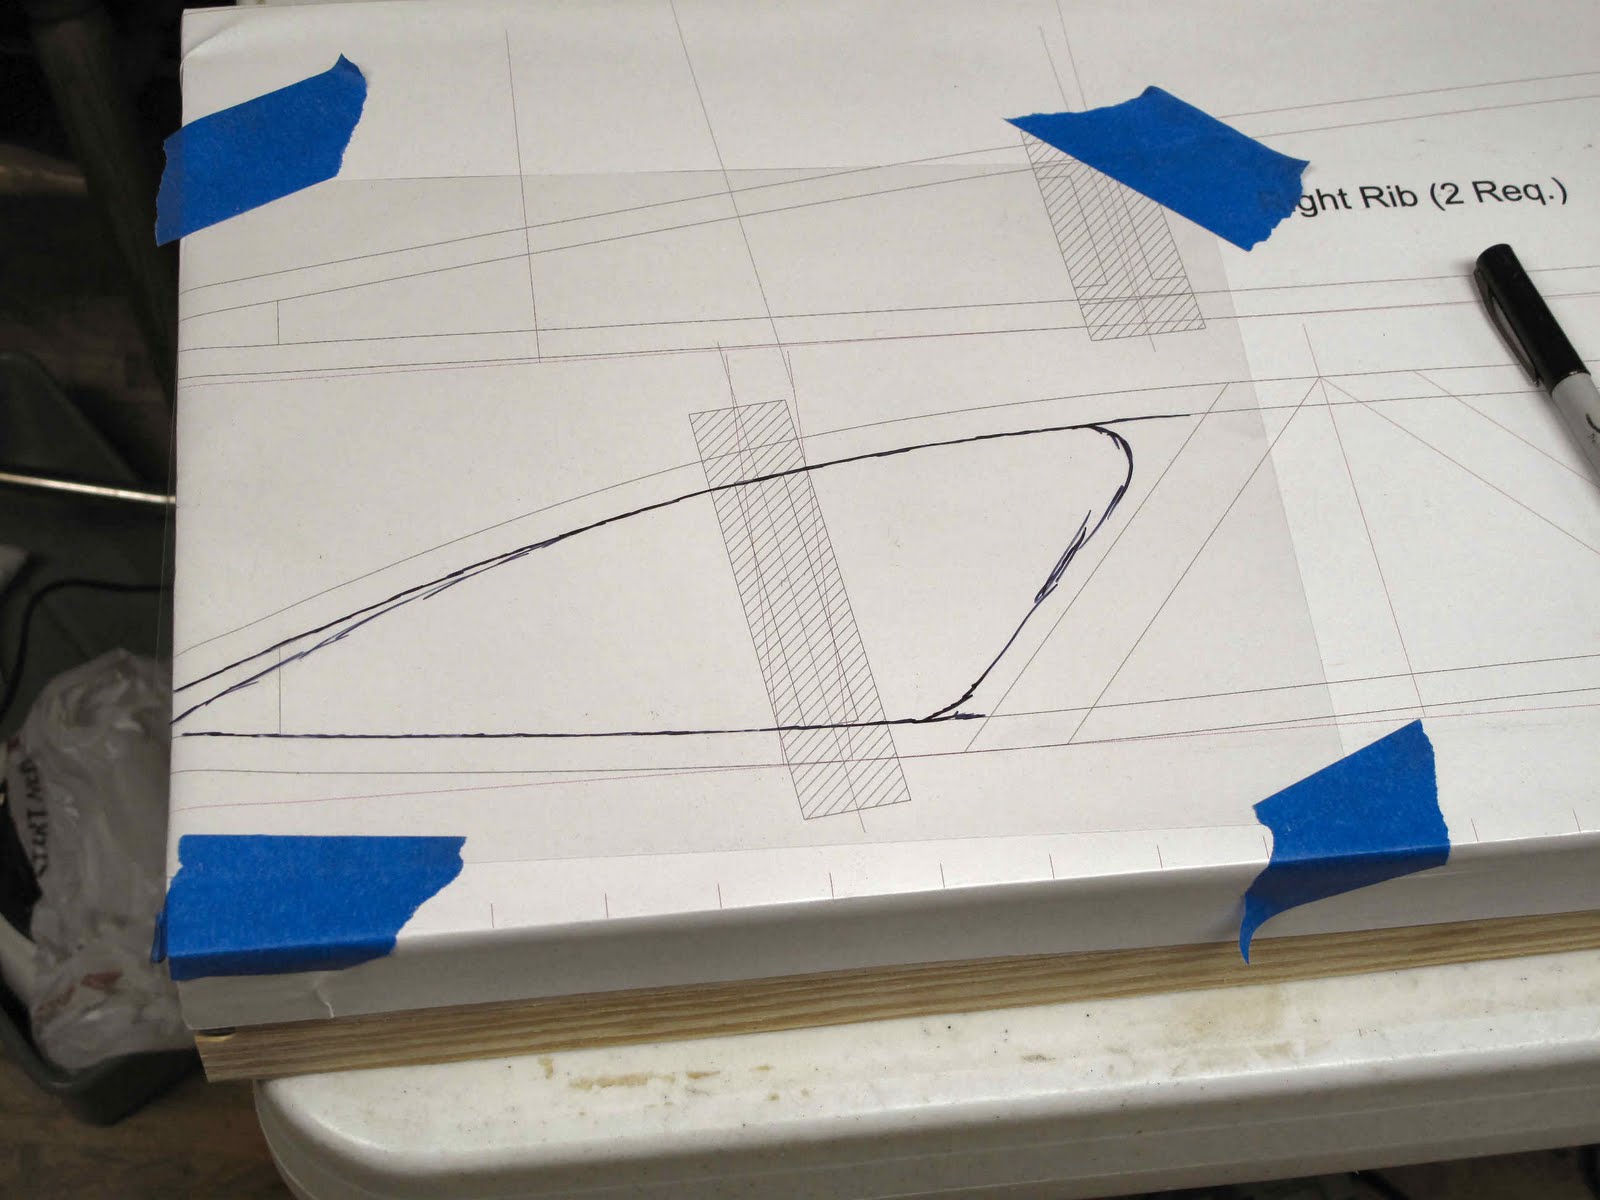
We'll start with the factory drawing. This is the drawing made for the model TEN series of planes. Fortunately it is the same part used on the NINE. The only problem with it is 17ST aluminum sheet is no longer made. We've used 5052-H32 which is then additionally work hardened during forming .
.
.
.
.
At the 2007 WACO Fly-in at Mt. Vernon, Ohio Cliff Hogan flew home and brought back this forming tool which he believed was used at the factory to make parts. It appears to have a lot of use on it so it might be the tool. He also brought an original rib, very cool. Our effort was to make a tool based on the ideas in this one. We used these photos and a few others I took to figure this out.


Thursday, February 24, 2011

Updated Forming False Nose Ribs P/N 362

Over the past few months I've been working with John Gaertner of Blue Swallow Aircraftto develop a tool for making the False Nose Ribs for the wings on the NINE. John had a job to make a tool and I needed a tool to make my ribs. John's shop is down the road from me, closer to Charlottesville. After we got the tool working for John I wanted to experiment some more with the process for making parts. These 2 videos show the result of that effort. The next Blogs after this will explain how we got to this point.
.
The ribs are an aluminum channel bent to the shape of the airfoil from the leading edge to the front wing spar. The rib continues a few inches past the spar as it bends down from the fabric so there isn't an abrupt end.
.
This should have been easy. We had the factory drawing. I had photos and measurements of the tool like this which was believed to be the factory tool. The problem was the original parts were made with 0.025" thick 17ST (2017) aluminum. They don't make 2017 as sheet stock anymore. The closest aluminum in terms of chemistry and physical properties is 5052-H32.
.
The result shown here is simple, shear strips 7/8" wide, notch one end of the strip, and roll form the rib over a block shaped so that when the part springs back after forming it has exactly the curve of the airfoil. Getting here was a cool adventure. The tools you'll see here were made with a band saw, belt sander, and a drill press to drill some holes.
.
Enjoy
.
Cutting the notches in end of the Blank:


Forming the finished Rib (Updated Video):

Saturday, February 5, 2011

First 2 Tip Ribs Done

Last night I glued up the first 2 Tip ribs. The gussets are only on the inside of the rib. There are 2 which go on the outside at installation. The 1/2" sq. diagonal braces for the tip bow have to pass through them so there is no hope of prepositioning them correctly.
.
.
.
.

Today I took the ribs out of the jig. I was surprised how well the sticks were bent when I removed the ribs. The shape is perfect with very little spring back. I soaked the sticks for 2 days and steamed them for 30 minutes so they were very soft to bend.
The next set of sticks are steamed and in the jig drying.

I'm starting assembly of the solid ribs which I cut the pieces for a few weeks back.

Friday, February 4, 2011

Tip Ribs

The rib at the wing tip bow is a smaller rib made of 3/8" sq. spruce cap strips with 1/16" plywood gussets. The are no internal sticks. A new rib jig was needed. A piece of 1/2" plywood 24" x 48" from Lowes and a drawing of the rib and we're ready to build the jig. I only need 1/2 of the sheet so the rest of the plywood was used to make some 2" strips of wood to stiffen the jig. I know you can just use a piece of plywood, but I just can't use a warped jig to build ribs. Also the space under the jig board allows screws to stick through without worry of the length of the screws.
The drawing was glued and taped to the top of the board and then waxed with carnuba wax to keep glue from sticking. The drawing took longer than all this building work. The factory drawings show the same rib as the TEN but that is not exactly correct. The aileron arrangement is different on the TEN. As a result the ribs for the lower wings are longer and the upper are shorter than on the TEN. I decided to make them all long and trim them to fit for the upper wings. They did design the taper at the end of the spars so the same basic rib fits both upper and lower. The ends if the sticks have no gussets and get trimmed and positioned to fit on the wing.
The 3/8" sticks need to be steamed and bent at the forward spars. I could have made form blocks like I did for the main ribs but we are just making 4 ribs total. Therefore I made the form blocks part of the jig. The sticks are left in the jig 24 hours to dry the wood before adding the gussets. I over bent the top stick slightly to help with spring back. To make the block I used a sheet of overhead transfer plastic and drew the block shape on it with a permanent marker. It doesn't have to be perfect because I'll belt sand the block to fit. Cut out the pattern and trace it on the block. I use these projector sheets rubbed onto my computer screen to freehand draw complex curves with washable markers and then draw with the CAD system.
Holding blocks for the sticks are cut from 1-1/4" dowel. I use a piece of tape as a guide to cut the length. You can't use the fence because the block will get stuck next to the blade until the saw flings it out.
I drill the off center holes in the blocks with a vee block on the drill press because it make it easier to hold them. The paint bucket is my parts catcher, better than the floor.
I countersink the holes because I use flat head drywall screws and the countersink keeps the block from splitting when the screw is tightened.
The blocks are laid out on the board to make sure I have enough.
.
.
.
.
.
.
.
.

The final position of the blocks varied a little because I bent a stick as I installed them to make sure where they were needed to hold the sticks to the lines.
After steaming the forward ends of the sticks were quickly bent using the top of one of the form blocks before installing in the jig. The holding block at the front of this rib is removed to do this.
.
.
.
.
.
.
.
.
While the bent stick is still hot it is quickly installed in the jig.

.
.
.
.
.
.
.
.
The end of the lower stick on this rib had to be cut to length so I could bend the last stick on the top of the block.
.
.
.
.

Once the last stick was bent the holding block at the front end of the rib had to be quickly reinstalled.
Adjust block to hold stick tight and in the correct position.
.
.
.
.
.
.
.
.
Sticks in the jig and drying before adding gussets.