Showing posts with label Cowl. Show all posts

Sunday, January 3, 2021

Removing the Aft Cockpit Cowling


My Plane was purchased on the 20th of June and delivered on the 30th.  These 2 pictures were taken on the 28th.

On the right they are lacing the cockpit coming to the cowl after it was painted Valspar Dutch Blue.  The fellow on the left is also seen in the picture below Installing the cowling piece on a fuselage.

The originals of this whole group of pictures are now at the WACO Museum so I have hopes of one day scanning them at very high resolution to see what other secrets they hold.

Here's the same piece on my plane, just 96 years later and with me sitting in the middle.  My father was 1 1/2 years old when this plane was built.  

I've had the fuselage since 1996, but because of the every fragile condition of the seat and floor, I've never sat in it.  I've been doing all this without even knowing if I fit in it.  I decided now was the time.  With the cowl piece removed I was able to support myself on the lower longerons getting in and out so I don't think I damaged anything.  Once I was in we set the cowl back in place, while I worried the seat would collapse.

It's wider inside than our Fly Baby, but much less forward leg room.  I should be able to fly it just fine, but it's short.  It feels like Olde Tyme Flying just sitting in it.  Very Cool!

Even with a cushion on the seat, I set very low.  It's about like the back cockpit on John's D model WACO.  Just your head is sticking out, even for my 6' 4" frame.

The windshield should give good protection without goggles.

Now I see why my granddaughter calls me Grumpa.  This is my relaxed and happy face, really, I was enjoying this.

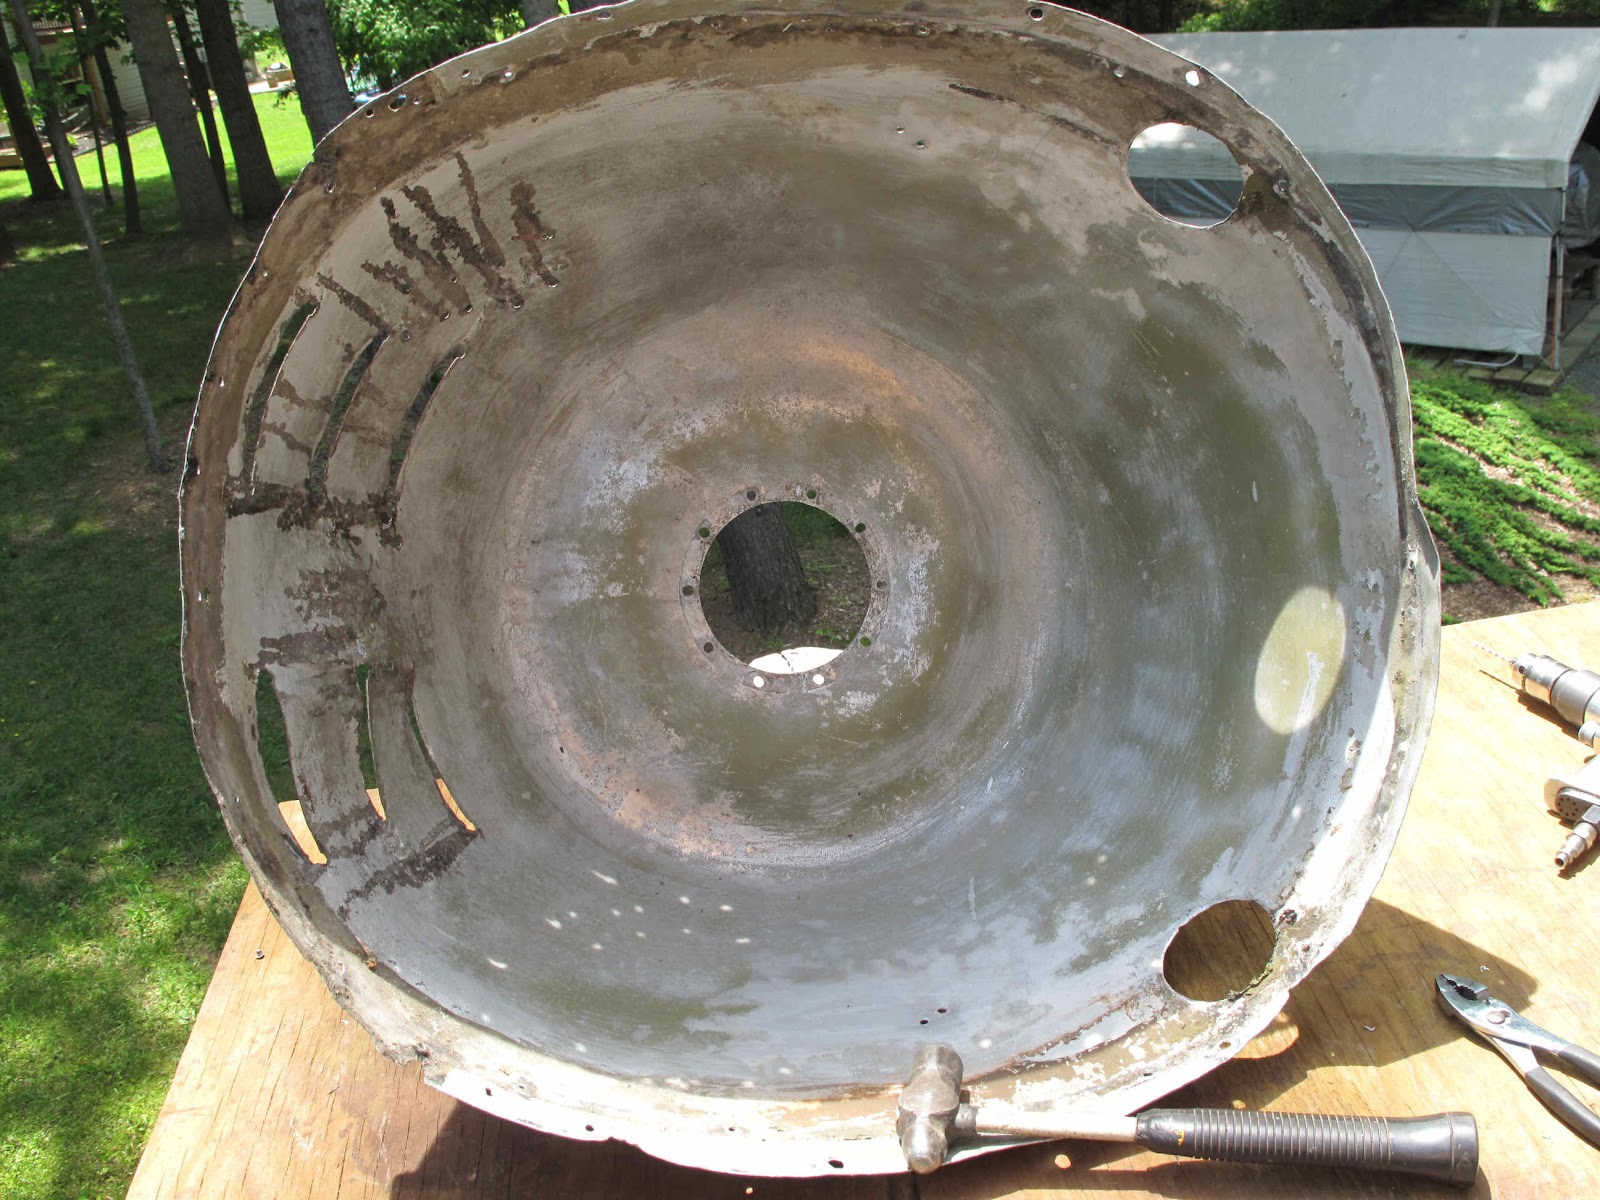
A portion of the front cockpit cowling still exists.  It was used to cover up the back half of it when they cut off the fuselage to make an air boat.  The big hole is for the gas gauge.  The row of little holes are for the screws which attached it the the forward dash panel.  I have some of the scrap which was cut off when they shortened this panel.  More on it in the future.

The aft ends of the front cockpit panel and the forward ends of the aft panel are separated by about 8 inches.  When you climb in or out of the front pit you support yourself directly on the upper longeron not the aluminum cowling.  

In the aft cockpit the rolled edge of the opening is about 5" up from the longeron.


To make it stronger, so the aluminum won't bend, they added a stiffener.  It's laced on at the top with the soft combing and screwed to the wood on the longeron.  

There is a nice hook next to it for hanging the seat belt.  I need to do that on our Fly Baby.  The belt is a pain right now, always getting caught on something.


They screwed the stiffener on with #6 x 3/4" brass wood screws and brass washers, just like the whole cowl piece is screwed on (42 screws).  I like the old tyme look of brass screws with the painted aluminum.  Much more of a WWI era look.
The Leatherette for the cockpit coming is padded with cotton batting and laced on with wide shoe laces.  
Along the top edge of the turtle deck forward former and the top of the longeron they used a strip of beaded trim.  It looks like something I've seen on old buggies.  It gives a nice finished edge to it.  On the edge of the former it hides the end of the covering fabric, which laps over the corner.

This trim strip has 2 beads neatly sewn in a piece of leatherette.

The beads separate so you can tack it down then roll back into position hiding the tacks.


It's tacked to the wood with standard upholstery tacks.  Looks like a good use for my 7th grade metal shop tack hammer.

On the longerons there is a piece of wood shaped to sit tightly on top of the tube.  It's held on by wrapping it with what looks like 2" wide pinked finishing tape, then doped through to silver.

After removing a piece of the beading, in what little is left of the front cockpit, I found the remains of some "black chase leather".  The sales brochure says:  "The passengers' compartment...  is completely lined in black chase leather."  OK, it's leatherette but I'm sure it looked welcoming to anyone with a buggy or early automobile.

My objective was to get the turtle deck off so I can repair it.  I plan to repair the aft cowling piece and reuse it, but first I'd like to repair the wooden turtle deck.


Sunday, May 20, 2012

Nose Cowl - P/N 7016

I've learned to gas weld aluminum while working on my Cessna 140 project so I decided now was a good time to work on repairing the nose cowl.  It's in pretty bad shape.  Someone has cut holes in the top and louvers in t he bottom.  The outer shell (P/N 7018) is spun from .040" soft aluminum.  The cost of getting a form made and having someone spin such a large piece (25" dia. x 12" deep) is beyond my budget. Making one without spinning it would require forming sections and welding them together so fixing this one seems a better plan.

The stiffness of the cowl is created with a former (Collar P/N 7019) which is formed from 1/2 hard .032" aluminum.


The first step is to strip the paint so I can work on the bare aluminum.  I've tried several strippers and I think I've found one I like.  It's Zip-Strip Contractor Plus paint and finish remover.  It has all the nasty stuff in it that makes a good stripper work and it washes off with water very nicely.
With the paint and bondo removed it's obvious the plane this was on went on it's nose.  The cowl was roughly hammered out and it's pretty rough.

The top is in very good condition.  The holes will be easy to fill and there is a little wear where the belt buckle rubbed.  The cowl is all held shut with a leather belt and metal buckle.  Because the top is so good the worst I'll have to do is cut out all the bottom and replace it.  That's still better than making the whole thing from scratch.

There are some other areas which need fixing as well.  There are some cracks around the bolt hole where it bolts to the engine.  The is also a piece splice on to the bottom edge and a piece cut off near one of the holes.  I'll weld on some pieces to repair these areas.


With the paint mostly removed I've separated the spinning and the collar.
The collar has some pieces of spruce 3/4" x 1" nailed to the front as a stiffener and a .148" wire formed into the edge of the oval opening.  I only bought a quart of stripper to try it out so on Wednesday (old folks get 10% off) I'll get some more stripper to finish cleaning up the parts before starting work on them.  Fortunately I have the drawings for these parts so I'll be able to repair them correctly.

Tuesday, October 5, 2010

More Parts and Info for the Project

The summer is over so I now have more time to work on the planes. I'm continuing to make the last of the stick built ribs while learning about the solid ribs which still need to be made. More on that next time. While travelling to a few fly-ins this summer I acquired some very cool things. At the Waco Historical fly-in I was talking with Tim Pinkerton who has a KNF and 2 WACO TEN projects. He mentioned he had a nose cowl he was sure was for a NINE and was willing to trade it.

It's been modified with various holes and a lot of dents but if repairable and otherwise matches the drawings exactly. It will be one of my winter projects to repair it. It's made from a spun aluminum part with a former in it to give it it's oval shape and stiffness. It is so cool to have another original part. Because the front of the fuselage was cut off I had nothing of the engine cowl.
This would have been the most complicated part to make for the cowl. I'd like to repair it and paint it in the original Dutch Blue. Anyone have a 1926 ValSpar paint chart with dutch blue in it. I do have some original paint on the cockpit cowl parts under the black repaint of long long ago.


The next cool thing was also at the Troy fly-in. Jim Beisner was kind enough to loan me his WACO TEN gas tank. It's the same as the NINE, 83 pounds of terneplate and solder. It has a dent on one side and a small hole from a branch on the other side. Both are easily fixed. Because there are no NINEs flying I wanted an original tank to keep the weight and balance the same until we know the rigging is right and the plane flys well. After that we'll make an aluminum tank and use the weight saving for something more important like a starter.
.
.
.
.
.
.
.
.
.
.
The last cool thing, for which I have no pictures is the result of going to the American Waco Club fly-in at Creve Couer. Steve Curry of Radial Engines Ldt. was there. Along with his engine work he's been gathering every bit of data on WACO TENS, he has a project plane. He's been scanning all the drawings he can get his hands on and put them all on a DVD. I loaned him my copy of the drawing list for the first 4,000 drawing numbers to add to the DVD.
I bought a copy and it has already been a gold mine worth twice the price. The large drawings will need a copy from the NASM archives because of scanning limits. The smaller ones are great.
Because the TEN is an improved NINE many of the details of how parts were made and many of the parts are in the TEN drawings. They made very few NINE drawing. The planes were nearly all built before the feds required drawings. Much of the little details just are not on any of the NINE drawings. For the TEN they eventually made drawings of almost all the parts. It's just been great.
My next WACO project will be an NAZ primary glider. I have a copy of the master drawing list which includes the NAZ and they all seem to be on this DVD.
Thanks Steve, Jim and Tim!