I'm using Oil Based Polyurethane Spar Varnish to have a finish which is flexible. The idea being that as the wood expands and contracts over time the varnish doesn't crack allowing moisture in.
I started by varnishing the big areas first, wing walk, spars, etc. A 1 1/2" tapered brush is about perfect for these areas.
With the big areas done the problem was how to varnish in the corners of the ribs where the gussets are attached. I was at the hardware store and saw these 1" wide by 1/2" thick foam brushes for $0.79. They are pointed, like a paint brush along the tip, so I took the scissors and added a point on the flat side to fit the corners better.
That worked well. It was a little big for the small areas, but I was able to get varnish in them.
It only lasted a few minutes before the foam fell off. Bummer, but I like the idea.
I decided to make my own. I had some similar open cell foam, unfortunately a little dirty but good enough to try it. I also had 3 sizes of craft sticks, wide tongue depressors, Popsicle sticks, and skinny coffee stirring sticks. I also used the foam from a couple of the ones I bought.
Split the foam open and glue it together with Contact Cement. It just has to dry for about 15 minutes before closing it together.
The skinny ones worked best but didn't last long. We need more of them.
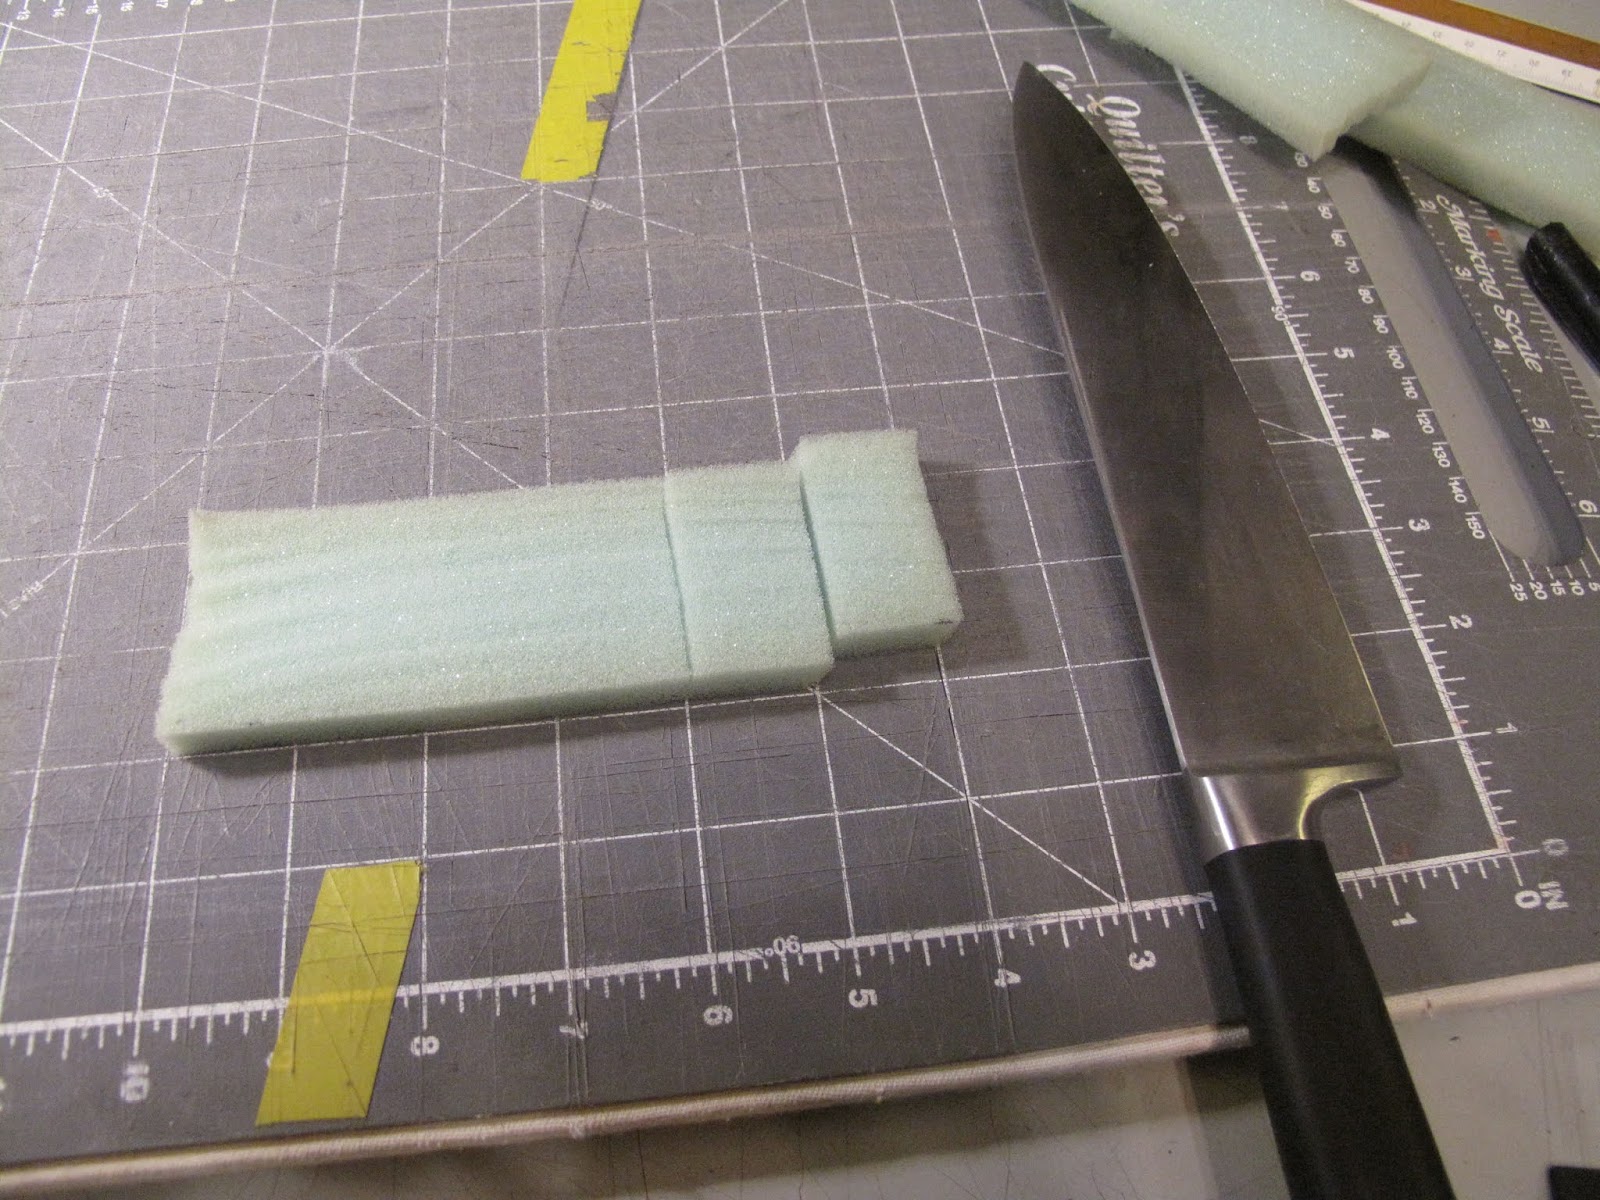
I had some softer foam, which didn't last as long in use, but I have plenty of it. I sliced off some pieces 3/8" thick, the same width as the rib sticks, from a 2" thick piece of foam.
Then I cut them to width. I tried some more 1" wide and the rest 3/4" wide, they worked best.
Just take a 30 degree breakaway knife, stab it in to the edge about 3/8" from the end.
Then cut a split to the other end. It works.
Fold one side back and apply Contact Cement to the other side. Fold them back together and gently press. Glue ends up on both sides. Then peal it back open.
Put glue on the stick. Push the end of the stick in the fold to help hold the foam open while the glue dries, 15 minutes. When it's dry gently squeeze it shut and let it dry overnight.
Point the ends with a pair of scissors and you're ready to swab some varnish.
The wider, 1", ones were nice in the big nose rib gussets but you need the flexibility of the coffee stirrer stick.
In the end the only ones that worked well were the 3/4" wide ones for all inside surfaces. You can feel it slide easier as you get the wood coated with varnish. It doesn't take much varnish to do the deed. That little piece of foam will hold a lot more varnish than you need.
This would be a fools mission without the rotating stand. I varnished from one side of the wing on a couple ribs, then walked around and did it from the other side. Then I rotated the wing 180 degrees and did from each side again. It's slow but you miss a lot of little spots from any one position. It takes about 2 - 3 hours per coat per wing and uses 1 1/2 to 2 quarts per coat per wing.
I got 2 - 4 ribs per swab before they started falling apart, so I made a bunch of them.
I borrowed my wife's
Handy Paint Pail. It has a clear plastic liner, a strap to hold it on your hand, and a magnet to hold the brush while using a swab or rotating the wing. Much easier than holding a quart can, which I kept tipping and pouring varnish on the ground. At $45 per gallon you do not want in poured on the ground.
Along with the swabs I'm using a 1" brush for everything not needing the swab.
By the end of the first coat I was getting pretty good at this.
I decided I needed a can for cleaning the brush. There are a lot of solids which settle to the bottom. They make a mess when you stir them up cleaning the brush. I made a grid from 1/2" hardware cloth with the edges folded down so there is about 2" for yuck to accumulate. The paint thinner is an inch or so above the grid. It works great.
Finally a wing with 2 coats of varnish. I still need to put 2 coats of epoxy varnish where ever the fabric will touch. It's about $90 per quart so it only goes where fabric will touch. The solvents in Dope or Poly-Brush will lift regular varnish if it's not protected with the epoxy varnish. It needs to dry for a week or so before putting on the fabric so no rush this minute. I only put 1 coat of spar varnish on areas getting the epoxy varnish.
After taking the pictures of the wing I went inside to work on our big printer which we use for printing
banners and
tee shirt transfers. There were these nice foam swabs I'd forgotten all about. They work great in the small areas and the 3/4" homemade ones work great in the nose ribs. We buy them in packs of 50 from our distributor, but I've seen packs of 200 for $18 on line.
On to the next wing.