Saturday, February 8, 2020

Selecting Spar Quality Wood

I was looking up references to give a talk on this at our next EAA Chapter meeting and thought I'd share this.  There are more things to look for, any defect should be questioned, but these are the more common things to consider.  The critical area for spars is the upper and lower portions where most of the load is carried.  For the WACO NINE the spars are routed to an I-beam shape so the flanges are critical.

Most of this come from the EAA Video "Basic Aircraft Woodworking" and AC65-15A.  There are plenty of other references to use if your are unsure about a specific defect.

 Sitka Spruce is the preferred wood because it is lighter for the same strength, but Douglas for is an acceptable wood for most plane I care about.  Spruce can have less Annular Growth Rings then Fir and be acceptable, part of why it weighs less.

When looking at the end of the board, the rings need to be at a 45 degree angle or steeper for at least 2/3 of the width of the board.

 Trees grow from the bottom up so the bottom is a larger diameter than the top.  As a result when we saw boards from the tree the growth rings usually run at some slight angle across the board face.  the board is stronger along the growth rings than across them.  Ever split some wood? Because the top and bottom of the spar carry the load, the slope of the growth rings on the outer 1/8 needs to less (15:1) than the interior (10:1) of the spar. 

Not Acceptable for a spar, or much of anything else.

 Once you have good straight strong wood you need to look for small defects. 
Small Hard Sound Knots may be acceptable if they are:
- Not loose
- Not running through the depth of the beam
- No bigger than 3/8"
- Not into the I-beam flange (high stress areas)
- Do not cause the edge to diverge
- Not closer than 20" for 3/8" knots

There is also something called Pin Knot Clusters which might be acceptable.
 Pitch Pockets, little pockets of sap, may be acceptable but there are a lot of limits.

AC65-15A has some tighter limits than the EAA video.  As an example it limits pitch pocket depth and width to 1/8" and length to 1 1/2".

Where the there are multiple criteria, use the the more restrictive limit


 Pitch pockets need to be further apart if they are in the same growth ring.  AC65-15A limits them to 14" in the same ring.

Remember Advisory Circulars and the EAA video are advice.  The person doing the work needs to use their best judgement from all they can learn to make safe decisions.

Wednesday, February 5, 2020

All Upper Spars Ready To Drill


 The aileron hinges are bolted directly to the rear face of the 1/2" thick web in the center of the rear spars, on the upper wings.  The hinges are an eye bolt and fork arrangement with a 5/16" bolt end.  The hinge sets in the carved out area and the rear face but the forward face doesn't need to be routed.  The areas where other things are attached are not routed, to provide extra strength.  The forward face of one of the old spars is not routed for the hinge at the tip of the spar.  The spar web is cracked at one of the inboard hinges.  I think the extra wood is needed at each hinge.  It means making the fork half of the hinges 1/4" longer to allow for the extra wood.  That's my plan right now.  Until I assemble the wings I can easily route these areas.


The layout is done on both of the upper rear spars.

I've started on the lower wing front spars.  When I get the lay out done on all the spars I'll start drill, then routing.


Tuesday, February 4, 2020

First 2 Spars Ready to Drill


 The 2 Upper Front spars are ready to start drilling and routing.

I set an original spar between them for comparison.  Everything matches exactly.  When they routed the spars, they used a shaper cutter of about 6" in diameter.  I have a plan to duplicate that shape at the ends of the cuts for the pads where the various fittings get installed.
The tip on the original spar must have cracked because they glued on a piece of spruce, 1/4" thick, on each side.  It gave me the idea to leave an unrouted area at he tip to have more wood for attaching the wing tip bow.  When I looked at he rear spar I found they had done this to strengthen the area of the outboard aileron hinge.  I'm working on laying out the routed areas on the rear spars now.

Sunday, February 2, 2020

Holes For Fittings for Upper Spars

There is only one Airworthiness Directive on the WACO NINE.  It was the result of wing spars on the upper wings twisting and cracking at the root ends.  At the time the belief was that it was the result of poor quality spruce used in the spars, but no one knew for sure.  I have the factory drawings for the parts and how they were to be installed.  The installation drawing gave the idea of how to do the installation but no actual dimensions for where to locate bolt holes.
 I spent a few hours bringing up the old drawings in TurboCAD, scaling them to actual size and the redrawing the parts to work out what they planned for hole locations

With these dimensions I've located the holes on the first 2 spars.  I've drawn the parts on the spars to help make installation more obvious later.  The upper and lower straps go on both face of the spars with 1/4" bolts.

There are also clamping plates on the top and bottom of the spars .  I'm not sure this makes a big difference but we will comply.


 The fittings for the wing struts and brace cable are also drawn on the struts to help make it obvious later.
This last bit is the taper down to the wing tip bow on the last 12 inches of the spars.

I'm going to lay out the areas to be routed as well, and I have the other 2 upper spars to finish marking up.

Friday, January 31, 2020

Laying Out Ribs & Bolt Holes on Upper Spars


 My first task is to layout all the Rib Locations and Hole Locations, in pencil, on the spars.  I wanted to work on all the upper spars as a group so I could see that they match.  They all fit nicely on the table saw and the roller stands.

 To make sure I get everything located correctly I marked the ends of all the spars and the faces.  The aft spars are more obvious but the forward spars rectangles and easy to mix up the orientation.  I stuck a sticky to mark the lower edge at the root end, just to help visualize what I was doing.

 All the bolt hole and routed areas are on the spar drawings but the rib locations and root attachment holes are only on the wing assembly drawings.
 I started with the rib locations.  To make sure the measurements didn't creep as I moved down the spar all the locations were recalculated from the root end.  The 1/4" thick root rib covers the spar ends so the start spars is 1/4" in from the start of the wing dimensions. 

To double check my calculations I measured each rib spacing after marking it using the tape measure from the root.

As I worked down the spars I kept the drawing positioned on the current location to help make sure I used the correct spacing.


 With the centers located, edge lines were drawn for each rib.
 I drew the rib locations on the between the spar surfaces since those are the faces I'll use installing the ribs, the forward face of the aft spar and the aft face or the forward spar.

I drew one spar at a time using the first spar to see if I made any errors.  I actually found a small error on the first spar when I did the second.  The width of the rib was wrong on one location.

With all the ribs located I moved to the spar drawing and located all the bolt hole.  Not all the holes are the same between the forward and aft spars.  I also marked to hole sizes for each to help assure I don't ruin a spar by drilling the wrong size hole.

Tuesday, January 28, 2020

Started Making Wing Spars

I stopped working on the WACO so I could get our Fly Baby out of the attic workshop.  The plan was to get enough room to build the wings.
 Fly Baby is back at the airport just about ready to fly.  I actually had it there in the spring last year.  I got it all assembled and climbed in to discover I couldn't operate the right heal brake until my hip replacement in September.  The surgery and recovery went great.  After 4 months I'm back flying a C-172.  Soon Fly Baby will be back in the air.
 I'm finally back working on the WACO.  I got out the spars I bought in 2008 and learned an important lesson.  I had checked the size when they arrived but did not do a detailed inspection of each board.  One of the rear spar boards had 2 defects which prevent it from being used.  I've contacted Aircraft Spruce and they are working with me to make it right. After all these years I appreciate their kind help.  Make it easy, check your wood when it arrives.

The other 7 spars were fine.  I ordered the boards wide enough so I could get some other long pieces from the scrap.  It looks like that will work out as planned.


 My neighbor George, a retired college football coach, helped guide the 15 foot long boards through the saw.  After Fly Baby left the attic I split it into 2 room with the door placed so we could saw the spars.  We set up 2 roller stands on each side of the saw, went slow and it worked well.  The next step is to locate and drill all the holes for fittings, etc.
Rich Wilbur has been working on his first wing and has it about done.  The 100th anniversary of our planes, 2026, is coming up fast.  Looking good Rich.

Saturday, May 27, 2017

Improvement to False Rib Forming Tool


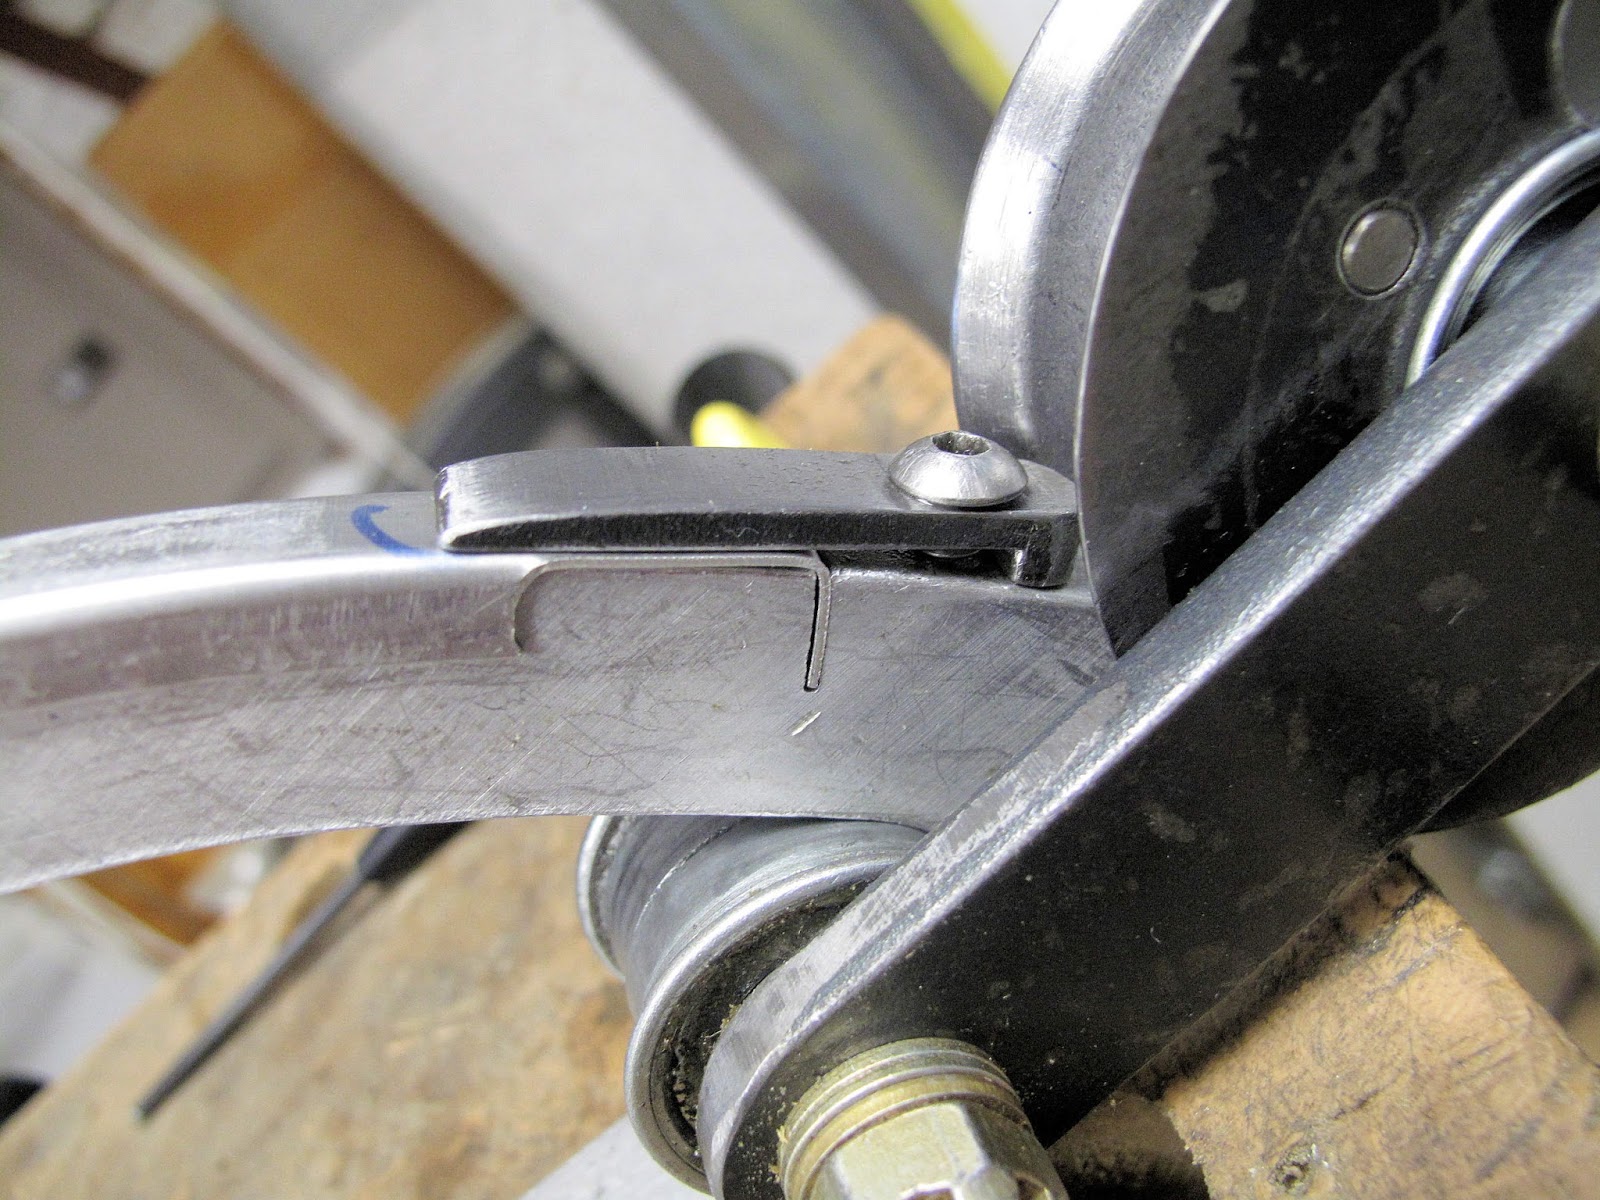
 I'm working on making a set of False Nose Ribs for the Hogan's WACO TEN project.  One of the things I discovered was that the bearings in the roller had worn out after about 600 pieces were made.  Back to Tractor Supply for some cheap new bearings.

 I also realized I could eliminate clamping the leading edge of the rib.  by changing the length of the small steel clamp which holds the tab in the slot, preventing the aluminum strip from sliding while forming, I can use it to replace the plastic clamp.
 
 The small tab was made just to hold the tab in the slot.  I made a new one which extends about 3/16" onto the formed rib.  At that point in the forming process the roller is pushing the ends down to start the form so the clamp is not in the way of the roller and I don't need to fool with an extra clamp, which was always sliding off anyway.

The clamp only touches the rib at the tip of the clamp.


1 min 23 sec video of rib forming.  The Blog software degrades the quality.