Wednesday, June 24, 2020

Finish Shaping Of The Leading Edge and Wing Tip


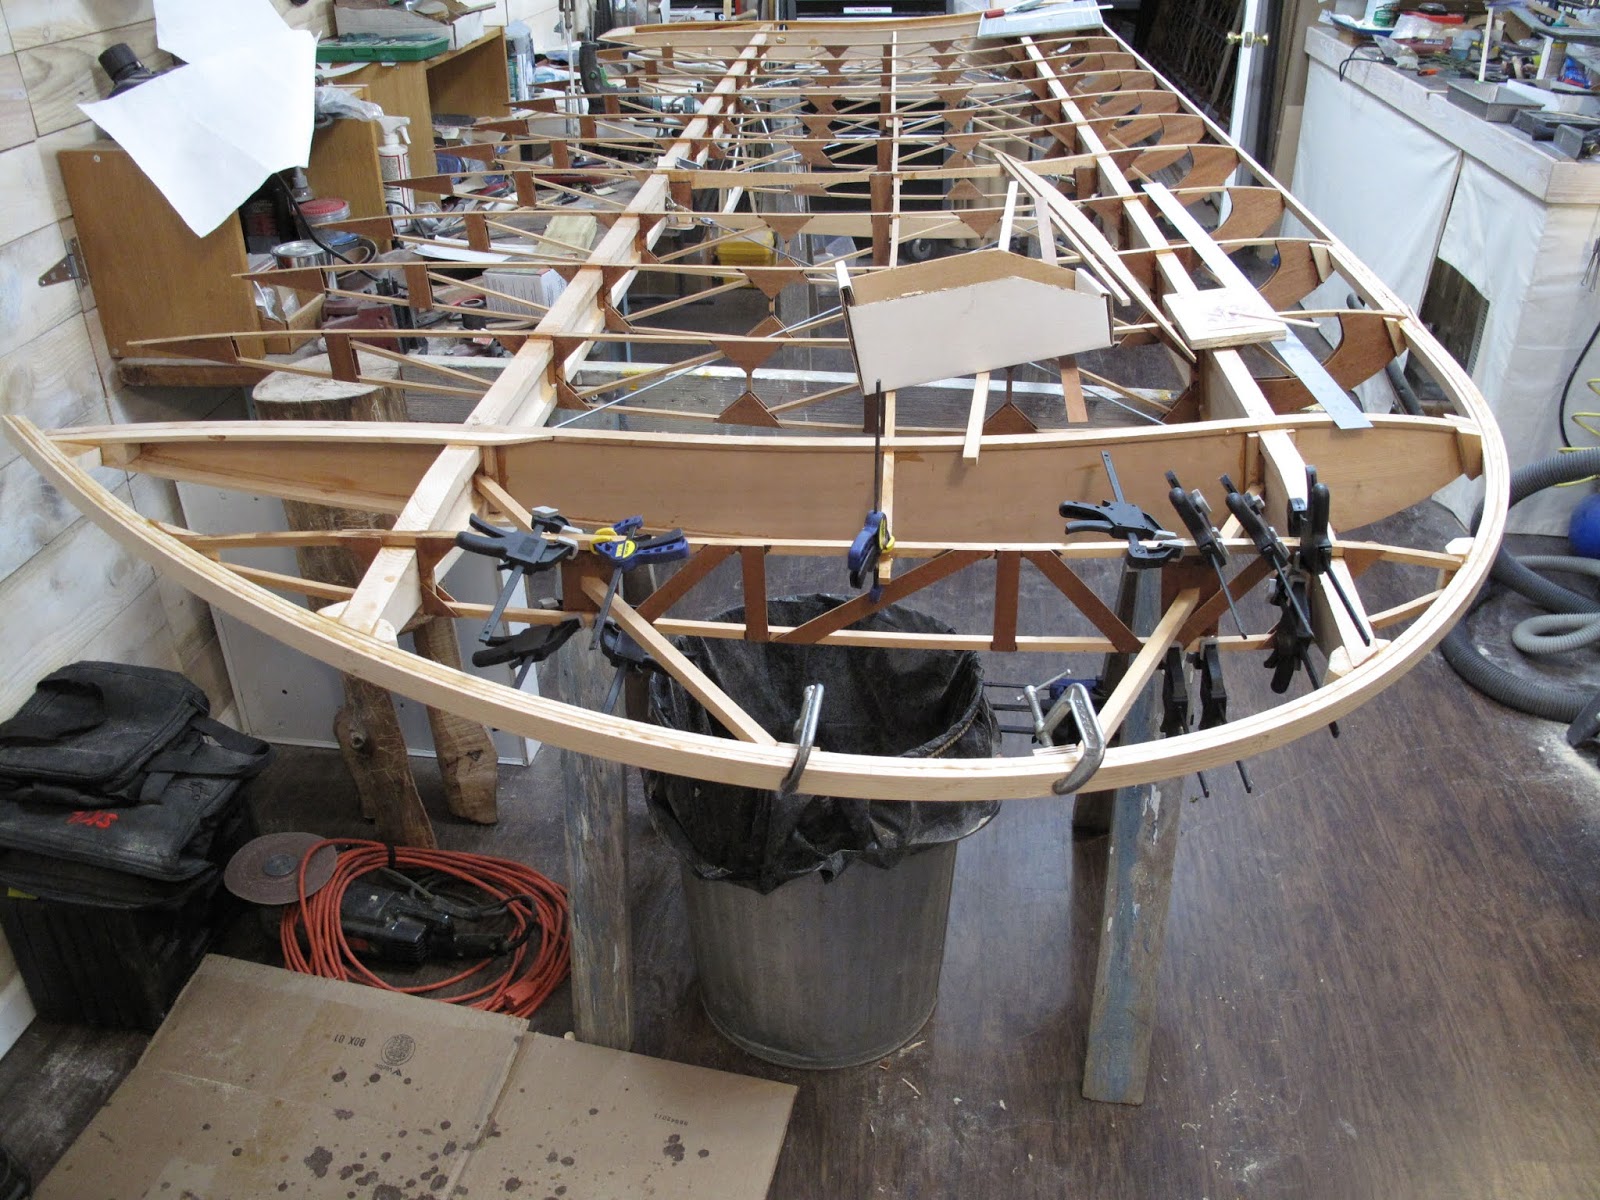
The little block plane worked well for shaping the leading edge.  When I was routing the spars I rounded the corners on it.  That really helped with this job.  When I got to a rib the plane slid right across it without catching on it.

The plane leaves slight corners because it only makes flat cuts.  A 10" bastard file knocked the corners down nicely.

I finished up with the 150 grit sand paper I used for the spar routing.

It was quick and easy, and the shape came out perfect.
On the tip bow I found my trusty disc sander was perfect for removing large amounts of wood.  I used a 36 grit disc and a very light touch.  This is what I use for sharpening and balancing lawn mower blades, so I use it regularly.  Once I roughed it down I used the plane, file and sand paper to finish it.
I had a spot where I let one of the laminations slip out of alignment during the gluing.  I made some filler with sawdust and T-88.  It sanded down to a nice smooth finish.  The glue does clog a file, so you need to keep cleaning it with a file card.

It really does look like a wing now.

I used the band file to shape the ends of the corner blocks so they will not show through the fabric covering.


Any edge of a block which might touch fabric was chamfered to soften the corner.


The leading edge corner of the plywood wing walk stuck out slightly past the leading edge wood.

It also had a slight gap because I finished the edge flush with the face of the nose ribs.

The block plane is nice and sharp so it was easy to use it to smooth the corner flush with the leading edge.

I used the wood filler I made to fill the gap, leaving a very smooth finish.

I'm looking forward to doing all this on the next wing.

Monday, June 22, 2020


 The wing tip bow has 2 diagonal braces running from each spar to about the middle of the bow.  The drawing gives dimensions for the locations of the ends at the bow.  They are from the center of the stringer connection the ribs.  I clamped on the square as a center line to measure from.

The little boxes are where the blocks are located which stop the tip end of the stick from sliding along the bow.  The dimensions are from the centerline to the other end of each block 4 9/16" foreward and 1 1/2" aft.  The blocks are 1 1/4" long, 1/2" wide, out of 1/2" birch plywood.  Why not just a block of spruce, it is what it is.


 The spar end of the sticks are in the corner of the solid rib and the spars.  I should have made the block on the spar, for the rib, wider so this end could be just square.  Although it may be glued in more securely this way.

The angles at  the tip had to be ground to fit.  The face against the block needs to be square to the face of the bow to be snug against the block.

 Same deal at the aft spar.


 Before these sticks get glued in they need to go through a hole in a gusset on the tip rib.  The TEN drawing shows these gussets but the hole is in the wrong place for the NINE.  The tip bows are shaped differently.

I found the holes easiest to cut with a Stanley knife, I know, it says Irwin not Stanley.  The scroll saw would have worked but it was quicker for 2 holes, with the knife, then to set up the saw, drill a starter hole, etc.  It worked best starting the cut in each corner, in each direction, on each side.  You can see the corners on the back after pushing through from the front.  The hole is 1/2" tall and about 9/16" wide.  I filed it to be a snug fit and then filed the sides at an angle until the gusset would naturally stay flat against the rib with the stick in position.

 I left the top and bottom long on these first gussets so I could figure out where the hole needs to be located.  I tried measuring but just couldn't see it well.
 The drawing says the gussets are 2" wide, with the hole centered fore and aft.  The forward one is 4 1/4" tall with the hole about 1 15/16" down from the top.  The aft one is 3 7/16" tall with the hole about 1 9/16" from the top.

I'll make the next ones with about 1/8" to 1/4" extra at each end and trim to fit.  The belt sander eats 1/16" plywood.


 Sticks, gussets and blocks ready to install.
 When I glued these in place I also added the remaining gussets for the tip rib behind the forward spar.  I had left them off earlier to make sure they didn't interfere with the stick gussets.


 Once I took the clamps off it looked to me like the forward stick should angle farther back along the tip bow.  Probably to about where the gusset will be in the middle of the "V" formed by the 2 forward rib gussets. 
Then I got even smarter and said gee I should see how all this compares to the original tip bow.  So I laid the old one on top of the new bow for a comparison.  That didn't help at all.  They had both sticks way farther forward than any drawing shows, go figure.  On the other wings I'm going to more nearly center the gusset because I think the end of that stick should be a little father aft.

Sunday, June 21, 2020

Lower Left Wing - Tip Rib Installed

The WACO drawing says this last rib at the tip is built in place.  Despite that there is a drawing for this same rib on the WACO TEN.  Even that drawing only partially builds the rib.  I used that drawing to build most of the rib.  The plan now is to finish it to fit in place.  Instead of diagonal sticks the rib just has long skinny gussets glued on the outboard side.  There are 2 gussets on the inboard side once the diagonal tip braces get added.
 I had marked the location of the rib on the spars when I was drilling the bolt holes so my first step was to mark where the rib is attached to the tip bow.  The 4' straight edge and a couple clamps made this easy.


 Then I fit the rib and clamped it in place.  The capstrips were made longer than needed so they could be trimmed to fit.

 Th angles are all compounded by the curve of the bow so I left a little extra wood when cutting.  This allowed me to grind a little and test fit until the forward ends fit the bow nicely.

I held one stick free of the belt sander while taking a little at a time off each stick.

Once the forward ends fit well the same process was done for the aft ends of the capsrips.

 The rib was then glued in place with small sticks between the capstrips at he spar, just like the full light ribs.  These small sticks were glued to the spars so corner gussets could be added once the glue is set.  The taper of the spars at this point means there is only a corner of the capstrip touching the spar.  I puddled some glue under this corner and used a couple nails to hold the capstrip in place.  They held fine while adding the gussets.  It's there to stay.

 I added a corner block where the forward ends of the capstrips join the tip bow as well as gussets to attach the rib to the vertical sticks on the spar.  WACO glued a block to the bow between the capstrips, then just nailed them to the block.  This seemed like a very weak joint.

 The same process was done for the aft ends of the capstrips and rear spar.

The next step is to add the diagonal tip bow support sticks.