 There are several ribs made of solid 1/4" thick spruce. On each
wing the butt end rib is made solid the full length of the chord and is attached on the inboard end of the spars. The other solid ribs are all split into sections in front, between or behind the spars. They also vary as to whether they have 1/4" cap strips, no cap strip, or 1/8" plywood (wing walk). As a result there are several variations. I could have just drawn them all by hand on the wood, way to much work and possible errors. As I like to do with most such things I made some templates from galvanized sheet. I didn't want to make templates for all the variations. If I had more of each rib to make I would have made router templates. Instead they are used to draw the parts on the spruce with pencil. The ribs are then band sawed and belt sanded to a close tolerance. In the end 4 template pieces were made since I didn't have steel wide enough to make the long ribs in one piece. The red line running horizontally is 2" above the cord line and used to assemble the pieces.
 By using some very strong magnets, I use for installing vinyl wraps on cars, my nice straight edge was clamped to the pieces along the line while soldering them together with overlaps the size of the spars. The solder joint doesn't look all that good because I thought I could sweat the pieces together without leaving a mess so I only fluxed between the joint. OK, their solid and straight, just ugly.
 The extra piece for the nose rib allows for the sections which do not have cap strips or plywood. The other sections allow for a cap strip on the bottom and plywood on top. It was easier to mark 1/8" sorter and redraw the top lower on the pieces with cap strips on top.

 Drawing the ribs meant making a list of what needed to be included for each piece being drawn since all the notches and hole are available on the template. It really went very quick and was well worth the time to make the templates.
 All drawn out like a big model airplane kit. It only took a few hours to saw them all out and belt sand the edges smooth and square. The notches for the step supports are rough sawn and will be finished to a snug fit during assembly of the wings.
.
.
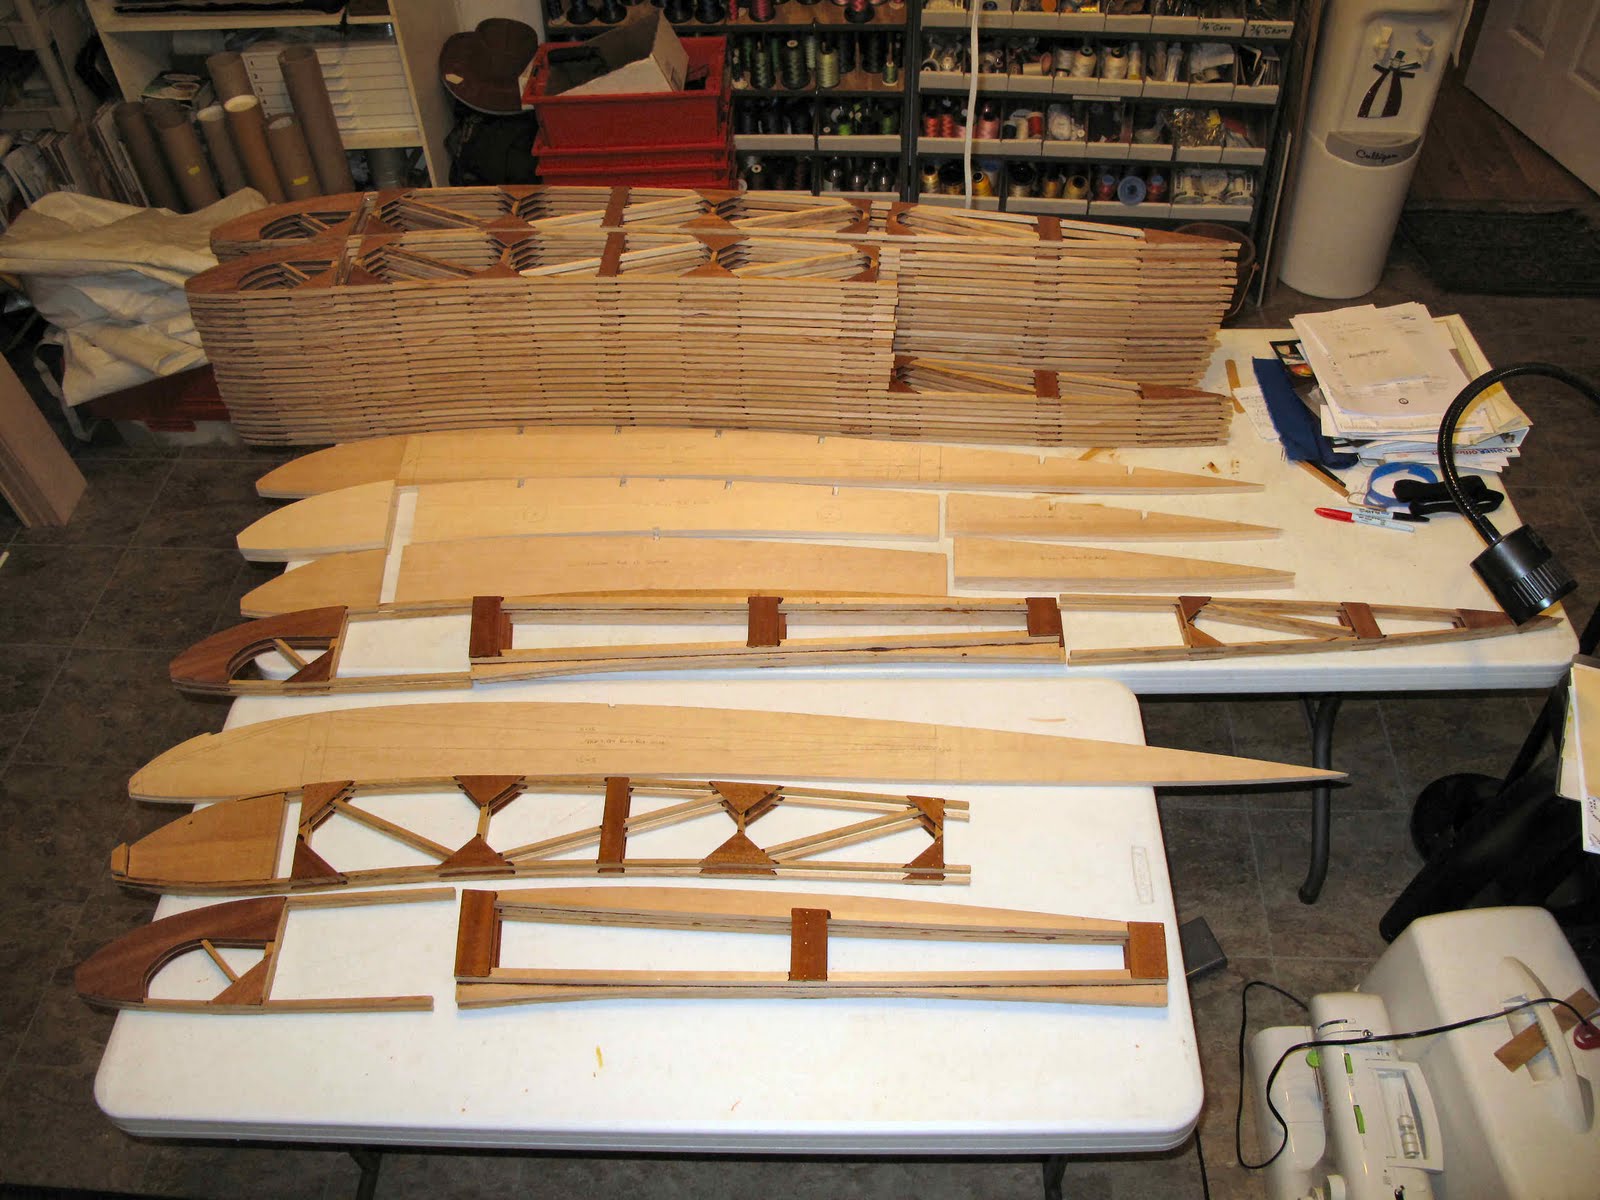 All the ribs needed to build the wings except the small ribs in the tip bow. We'll do those a soon as I get done cutting the cap strips and other sticks needed to assemble the wing. We're done with the slow repetitious work of building ribs. The next parts have their own challenges but it is so cool to finally be close to assembling the wings.

No comments:
Post a Comment