Monday, December 21, 2020

Blue Headrest


Now that the headrest is off the plane I decided to wash it, just water and a soft brush.  With the dust and loose paint washed off it's clear the headrest was blue before it was painted black.

The blue seems to be a good match to the blue on the old sheet metal.


This got me looking at old photos more closely.  Here's the front half of the plane taken the same day as the aft half.  Clearly the sheet metal is still blue.  It looks like Mr. Betz is wearing Black pants.

This is the last know picture of the plane, taken in warm weather between May 31, 1937 and July 1939, when it was owned by Joe Brown, left.  The sheet metal still looks Blue and the fabric on the side of the fuselage is still in silver dope, not black.  It's possible the guy on the right is the prior owner Carl Bradshaw, and this was taken when Joe picked up the plane in Pinehurst, NC.  Carl Owned or worked at Pinehurst Garage Company, the local Chevrolet, Packard, Cadillac and La Salle dealer.  There must be a picture of him out there.

Anyway no Black on the fuselage.


Sunday, December 20, 2020

Fuselage Aft Station - Fabric Air Dam and Rudder Cable Guides


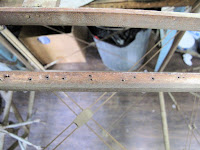
At the last station in the fuselage there is a piece of fabric laced to the tubes with flat brown shoe laces.  The only purpose I can figure out for it is to act as an Air Dam blocking flow through the opening for the tail skid.  The whole bottom of the fuselage aft of this station is open so I can believe there was exhaust coming back into the cockpit through that opening from positive pressure below the fuselage and negative pressure at the cockpit opening.


It's not a later addition because you can see it in the covered fuselage from this factory photo, June 26, 1926, within days of my plane leaving the factory.  Some day I'll get my hands on the original of this photo and do a higher resolution scan.  Even at this resolution, you can see that the view of top stringer on the right side of the fuselage is blocked by the air dam.

If we ever get a high resolution scan of this photo I may be able to identify the fuselage in the lower left corner.  It's written in pencil on the aft side of the former where the fellow is working.  Aero archeology is so much fun.
Here's what's left of the original air dam.  I don't imagine it would have been replaced when the plane was recovered, so I'm sure this is a factory part.  I've trapped it between 2 pieces of plexiglass to hold it flat for measuring, etc.  I also assume it's a factory part since it's so well made.  

It appears to be made of Grade A cotton with silver dope on the forward side and the aft side bare fabric.  It may also be made from some surplus balloon or dirigible fabric, which seems more likely than them doping one side of some fabric to make these.  The dirigible Shenandoah crashed Sept. 3, 1925 and the WACO factory made money hopping sightseeing rides over it. The debris was all looted.  How cool if this were a piece of fabric from the Shenandoah, OK back to reality.

It's about 10" wide x 15" tall with about 3/4" folded forward along the edges and sewn down before the brass grommets were added.  The 1 3/4" corner notches are for the brace wire tubes in the corners, a la Fokker D-VII.  The fabric was trapped between the double wires which loop around the corner tubes.  The 2" x 1 3/8" notches, 7 1/2" up the sides, are where the rudder cables pass through.  More on then below.

I have plenty of Grade A cotton but it's already 30 years old.  I'll probably make this using Poly Fiber.

You can see in the pictures above a small piece of the shoe lacing used to attach the dam to the tubes.  The shoe lace seems to have protected the paint below it enough that you can see the candy cane stripes protected by them as they wrapped around the tubes.

I assume this air dam was needed because they went to a lot of trouble to make and install it.

Where the brace wire cross in the center of the bay there is a small roll of rubberized Friction Tape to prevent the wire and turnbuckle from rubbing.  They used friction tape a lot at WACO.

The rudder cables exit the fuselage aft of this bay.  To protect the cables from chafing on the tubing there is a piece of 1/8" thick leather about 2" wide laced to the vertical tubes.

You can see where the cable rubbed during about 1,100 hours of flying.

It's laced on with what looks to be cotton rib stitching cord, another thing they used a lot, think cheap like zip ties today.  The stringers on the sides of the fuselage were laced on with it.  A topic for another post.

I plan to make up CAD drawings for all this as I make up the new parts.


Saturday, December 19, 2020

WACO TEN Headrest Removed

 I've decided as I remove things I should repair or make new parts as I go.  This is the time when I have the most information about how the parts were installed, etc.  I think it's easier to get things right now then it will be a year or 2 from now.

Fortunately the first thing I've taken off doesn't need repair because it's not going back on the plane.

This picture was taken when the plane was about 1 year old and like all NINEs it does not have a headrest.  Remember they were trying to build the Model T of the air, cheap transportation.

In 1929 when Spangler and Fink owned the plane it still did not have a headrest.

Spangler sold his share to Betz and I have some pictures from 1931 while he and Fink owned it.  One picture shows no headrest.  In this picture however, the plane has new fabric and the headrest has been added.  In this and another picture it looks like all the metal has been painted black, as it is still today.

The fuselage fabric eventually got painted black also.

The headrest clearly matches the TEN headrest drawings.

Pretty simple headrest, a rolled piece of aluminum, a block of wood, some padding, tacks and leatherette covering.

There's some old fabric covering and original Dutch Blue paint on the sheet metal.  I wonder if I could fix up this cowl piece and keep that little bit of original blue paint showing.  That would be fun.

They clearly removed some of the padding material under the leatherette in order to get the headrest to set down tightly to the cowling.  The old pictures show it nice and round in this area as well as the rest.  We'll get to all that cockpit coming material once the cowling is removed.  The bulge along the edge is due to the rolled edge they put on the cockpit opening for stiffening, more fun for later.

This blue paint made me wonder about the Travel Air radiator I had.  It looks to me like Travel Air also painted their planes with Valspar Dutch Blue, nice color, commercially available.

The fabric on the fuselage was painted black but not under the headrest.  Someone recovering the plane and painting the fabric black would probably have painted the fabric before reinstalling the sheet metal.  This piece of fabric is probably from the 1931 recovering.  The plane only flew 7 more years.  If it was hangared there would not be a need to recover the fuselage that soon.

The center stringer on the turtle deck is double width to allow the 2 side pieces of fabric to be nailed to it during covering.  The nail hole spacing looks like only the factory nailed the fabric to this stringer.

When you roll back the remaining piece of fabric you can see that the last time the fuselage was covered they used a sewn envelope instead of the blanket method.  Therefore they didn't need to nail the fabric to the stringer.  The seam is a single row of stitching and the excess fabric is very neatly trimmed to 1/4" from the stitching.
This simple little headrest has been a lot of fun and very informative.  On to the next piece.


Friday, December 11, 2020

Fuselage In Attic To Start Repairs

 I've spent the summer and fall working on and flying our old Fly Baby.  I've had a lot of little problems with things that worked when I took the plane apart, in 1994.  Now I have an ignition problem.  

While I work on it I keep waiting for Aircraft Spruce to ship my wing spars.  The problem is there was a forest fire which has disrupted their wood supply.  They still aren't getting spar quality wood.

Since I can't work on the wings I've decided to start on the fuselage.

I didn't want to bring it to the attic earlier because it takes up too much space.  A while back I cut a big hole in the piece of plywood the bolted on the front in 1939, after cutting off the front half of the fuselage.

I haven't taken anything off for fear of losing things.  I haven't even sat in the seat.  I need to see if I fit in this thing.

My next project is to start documenting everything as I slowly take it all apart.  This will mean lots of photos and drawings.   I may work on making/repairing things as I take them off.  There are a lot of little things to work on, should be fun.

I made the entrance door to the attic 42" wide when I built the house so the fuselage would fit.  Other than the work of carrying it up a lot of steps, getting it in the attic worked out fine.  A nice winter project.