
I still think it makes drawing the actual lines much easier.
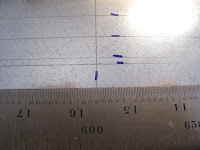
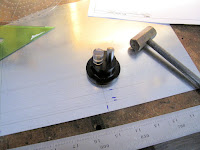 I used the optical center punch to mark all my holes and compass centers.


For holes I draw a small circle around the punch mark.
For compass centers I put 4 tick marks, kind of like center lines.
I have this cheap plastic compass I like for most big curves. The pattern of holes and markings are set up based on the circle diameter, in 0.025" increments, so I rarely use my conventional compass. It really works very well with my 0.5 mm lead pencil.


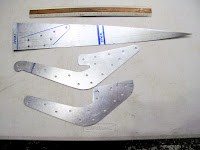
There are 3 pieces which all rivet together so the holes were transferred from the horn template to the other 2 templates. The horn gets riveted between the 1/4" spruce rib on one side and a piece of 3/4" spruce, stiffener on the other side. The rivets are Copper Rivets used for saddle and harness making.
The rib template can be used for the full length root rib as well as the 2 piece rib at the control horn. I'm also using it to make a small rib jig for all the aileron Light Ribs, stick and gussets.
The control horn template can also be used to make the doubler which gets welded on to the forward end of the control horn.

Making Progress!


No comments:
Post a Comment