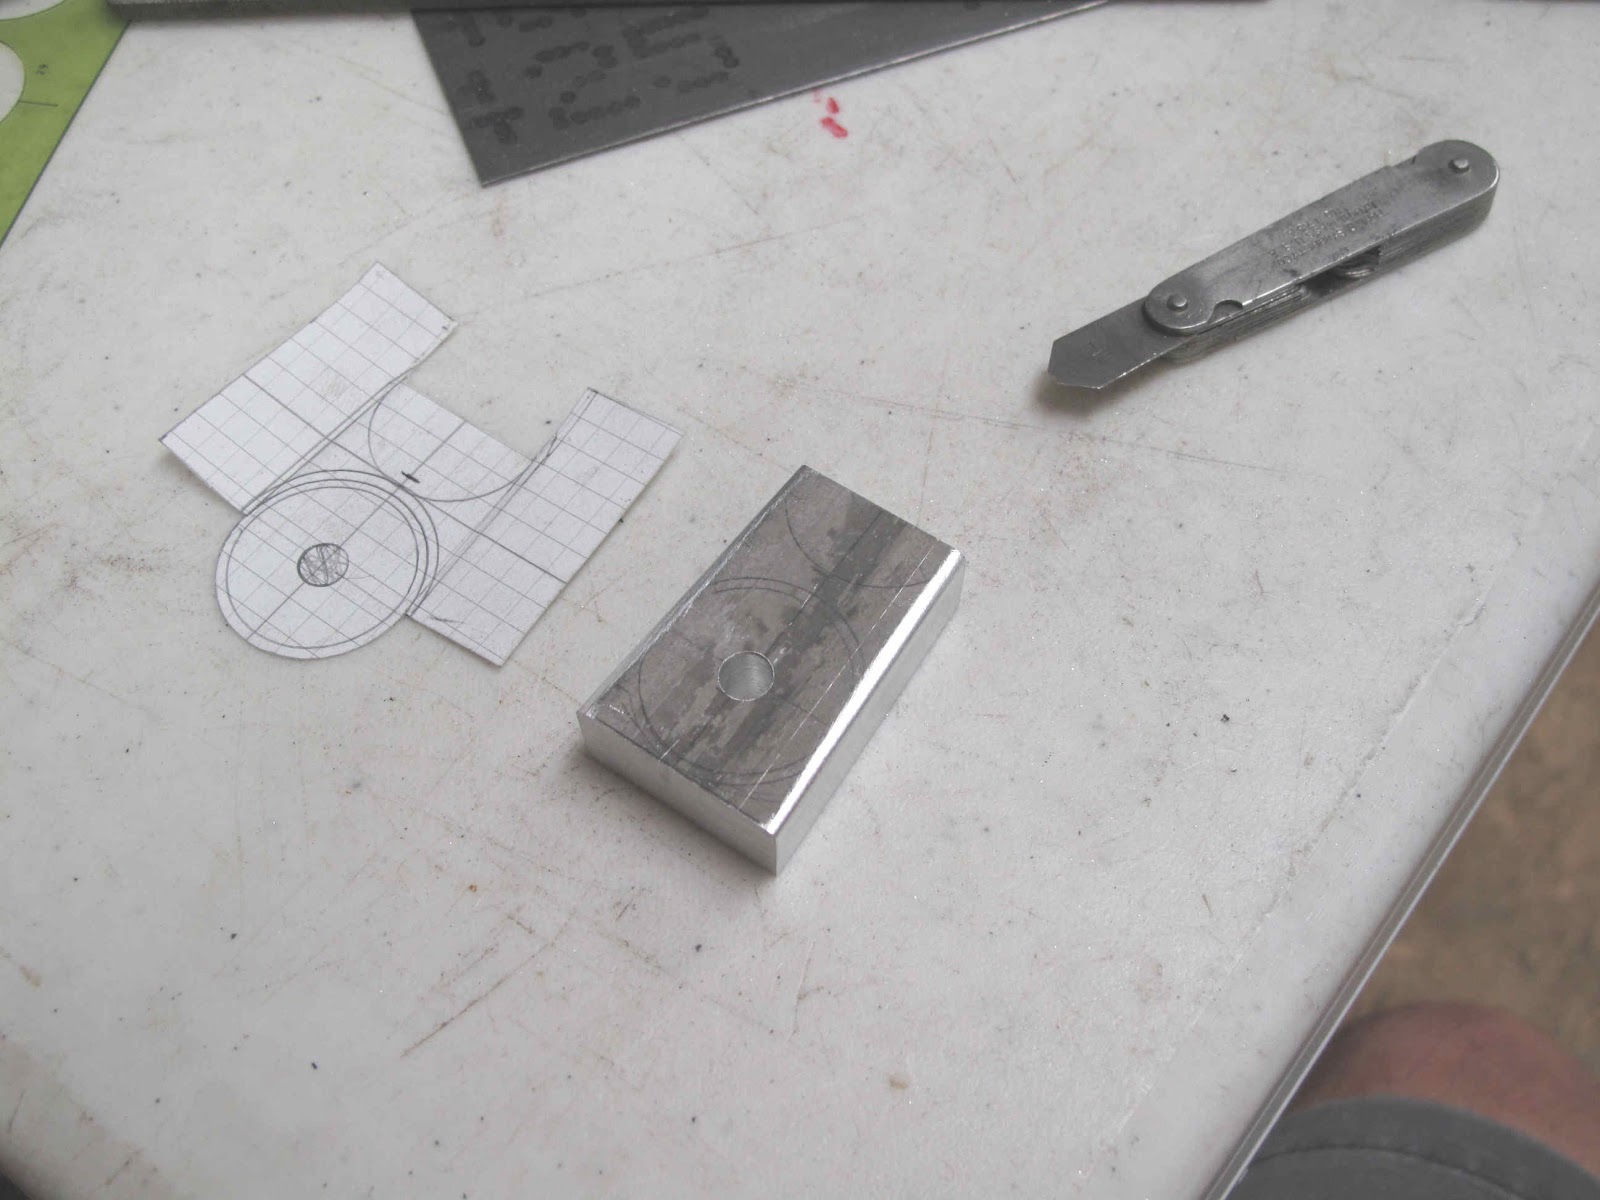
The bearing at the inboard end of each elevator also serves as the attachment bracket for the stabilizer to the fuselage. The bearing is made from a piece of 1 1/8" x .049" tubing 5/8" long. It is welded to a bracket which is folded from a piece of .050" steel (paper pattern shown). The bracket is welded to the aft side of the stabilizer rear spar. The end of the elevator spar fits into the tube and the bracket stops it from moving inboard. The hole in these brackets is for bolting the stabilizer to the tail post of the fuselage (more later).
This bearing cup is spaced out from the spar so that it is lined up with the 2 outboard bearings.
The spar on the stabilizer is made from 1" tubing and the bearing socket is made from 1-1/8" tubing so the bracket tapers from end to end. The easiest way to get this right is to make a form block to bend the bracket around. The only scraps I had that could take the pressure of bending .050" was some 1/2" thick aluminum. The 1/4" bolt hole makes a nice locator for holding the steel in position while bending it.
To get nice square sides on the bracket the sides of the block need to be ground to more than a 90 degree bend to allow for spring back. I ground this to 4 degrees past square. I should have used more like 5 or 6 degrees. Setting such small angles on the belt sander is easy by using a little trigonometry, the tangent of the angle = the rise over the run.
Aluminum heats up very quickly so it's easier to hold with some pieces of wood. I first ground the front to back taper to just touch my scribe line with the table square to the belt. When I added the spring back angle I carefully ground to just remove the scribe line.
The edges where the bend is formed were then filed to a 1/16" radius. I like to use the radius gauge to assure I get the radius I intend.
To make the steel blank I first made a template from some galvanized steel. I can screw it up several times without wasting expensive 4130 steel. The bolt hole is then drilled in the steel. The hole makes a nice a locator for scribing the cut lines. I use a felt marker before scribing like using die ink but easier. It realy helps to see the line.
The blank is then bolted to the form block and clamped in the vise for bending each side. The bend always comes out better if you hammer on a piece of hardwood rather than directly on the piece you're bending.
A nicely formed part.
To position the bearing cup and hold it in position I used a bolt and AN970-4 washer. The washer is 1-1/8" in diameter so it lines up perfectly with the outside edge of the tubing and clamps it very well. Where the tube welds to the bracket I left about 1/64" of bracket past the scribe line to make welding easy. It also leave the scribe line easy to see for aligning the tube.
I welded the outside edge and about 1/2" of the tube to the middle of the bracket. The tabs get welded to the tube when everything else is done.
With the parts welded the cut out for the stabilizer spar could be made. It made forming and welding easier to to this after welding on the tube.
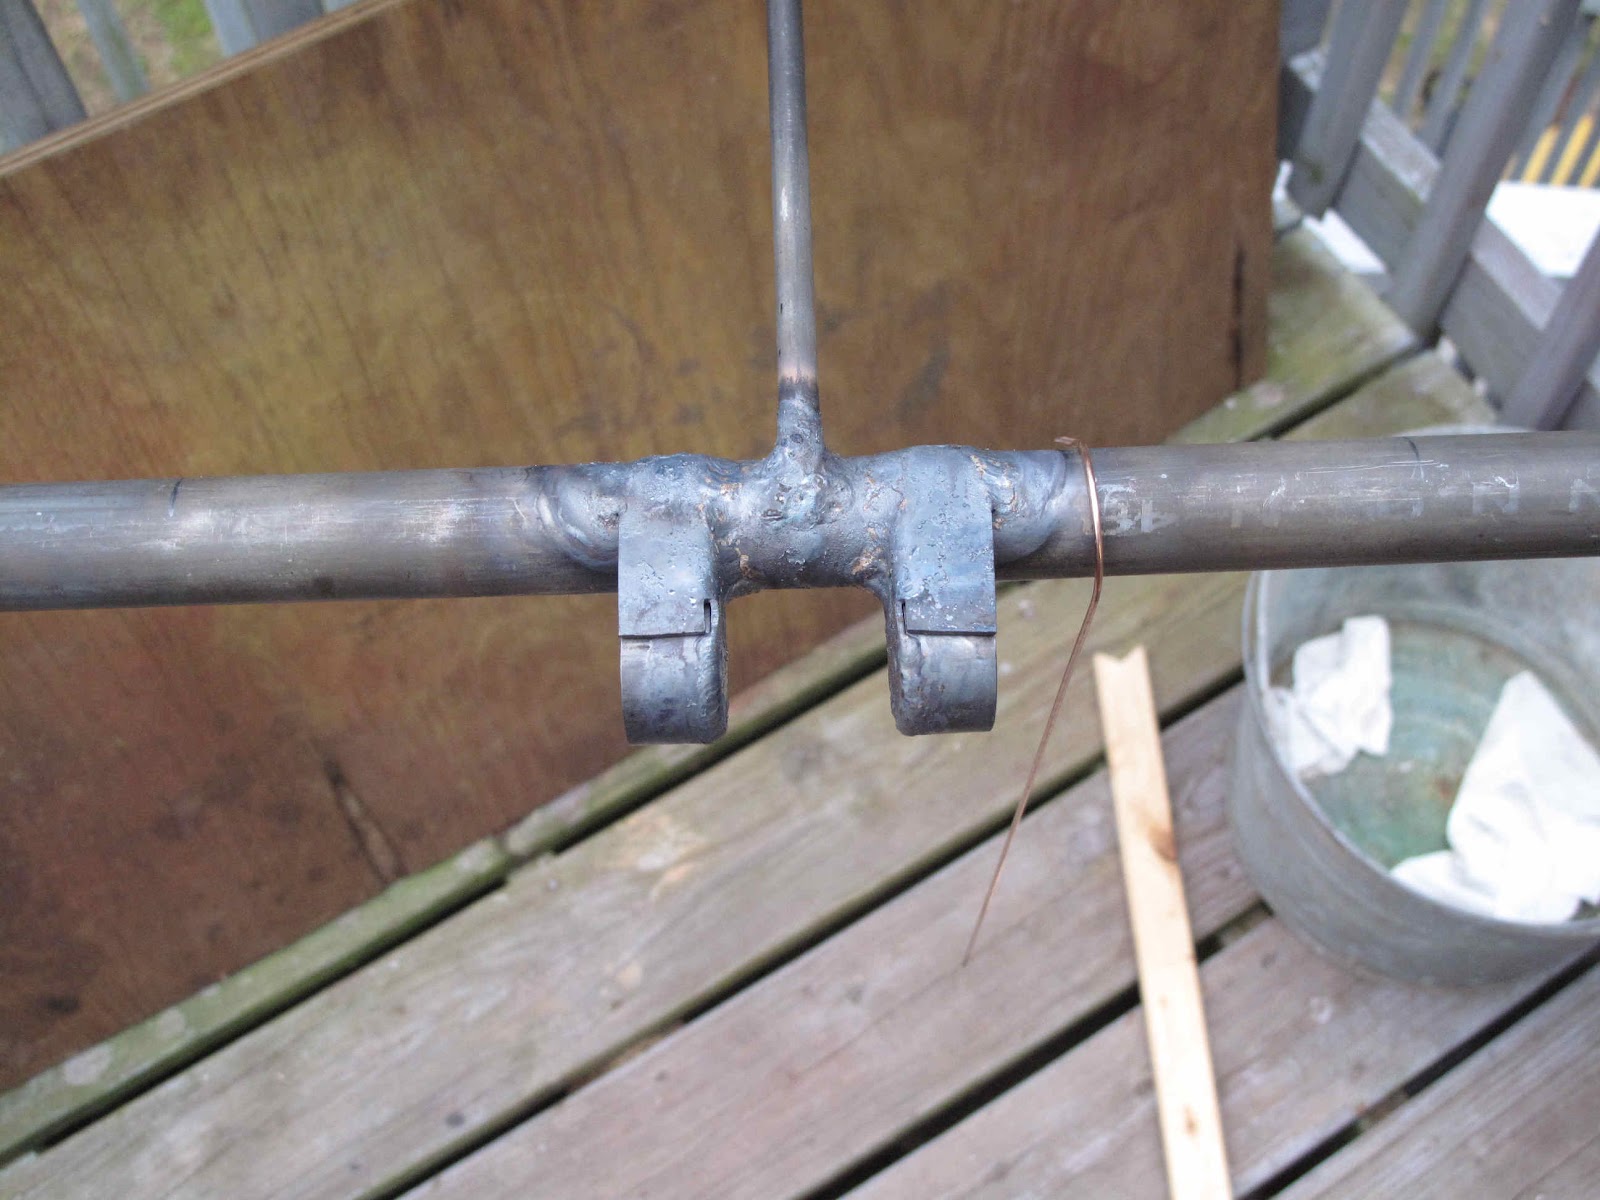
A piece of 3/4" tubing, with square ends, was cut 1-9/32" long as a spacer for the brackets. The tail post on the fuselage is 1-1/4" tubing. With this assembly bolted together it was clamped to the rear spar. A straight edge was used to align the Inside Diameter (I.D.) of the beading with the O.D. of the spars
One clamp at a time was remove to allow the assembly to be tacked to the spar. The ends of the tabs were then heated and bent to fit the spar. I don't normally bend 4130 hot but the area gets reheated to weld it. These parts should have been formed and positioned before assembling the stabilizer. After welding the brackets and tabs to the spar the bearing ends of the brackets were bent slightly to maintain the gap and square up the bearings before welding the tabs to the bearing tubes.
The outboard bearings could now be welded in position. First the ends of the tubes were drilled out to fit some stainless 10-32 screws. The screw just set there to hold the tube and bearing in position while welding the tube to the bearing. I should have welded these assemblies before assembling the stab. as well. Live and learn. They're turned 90 degrees to their correct position to make it easier welding the small tube to the bearing strap ends.
A piece of 1" tubing is inserted into the bearing cup and clamped with sticks to align it with the spars. This tube holds the bearings in position while tack welding them to the stab. Once these were tacked on, it was to dark to finish welding so I'll just have to wait for another calm evening. The bearings all line up great. I really need to go fit this to the fuselage.


No comments:
Post a Comment