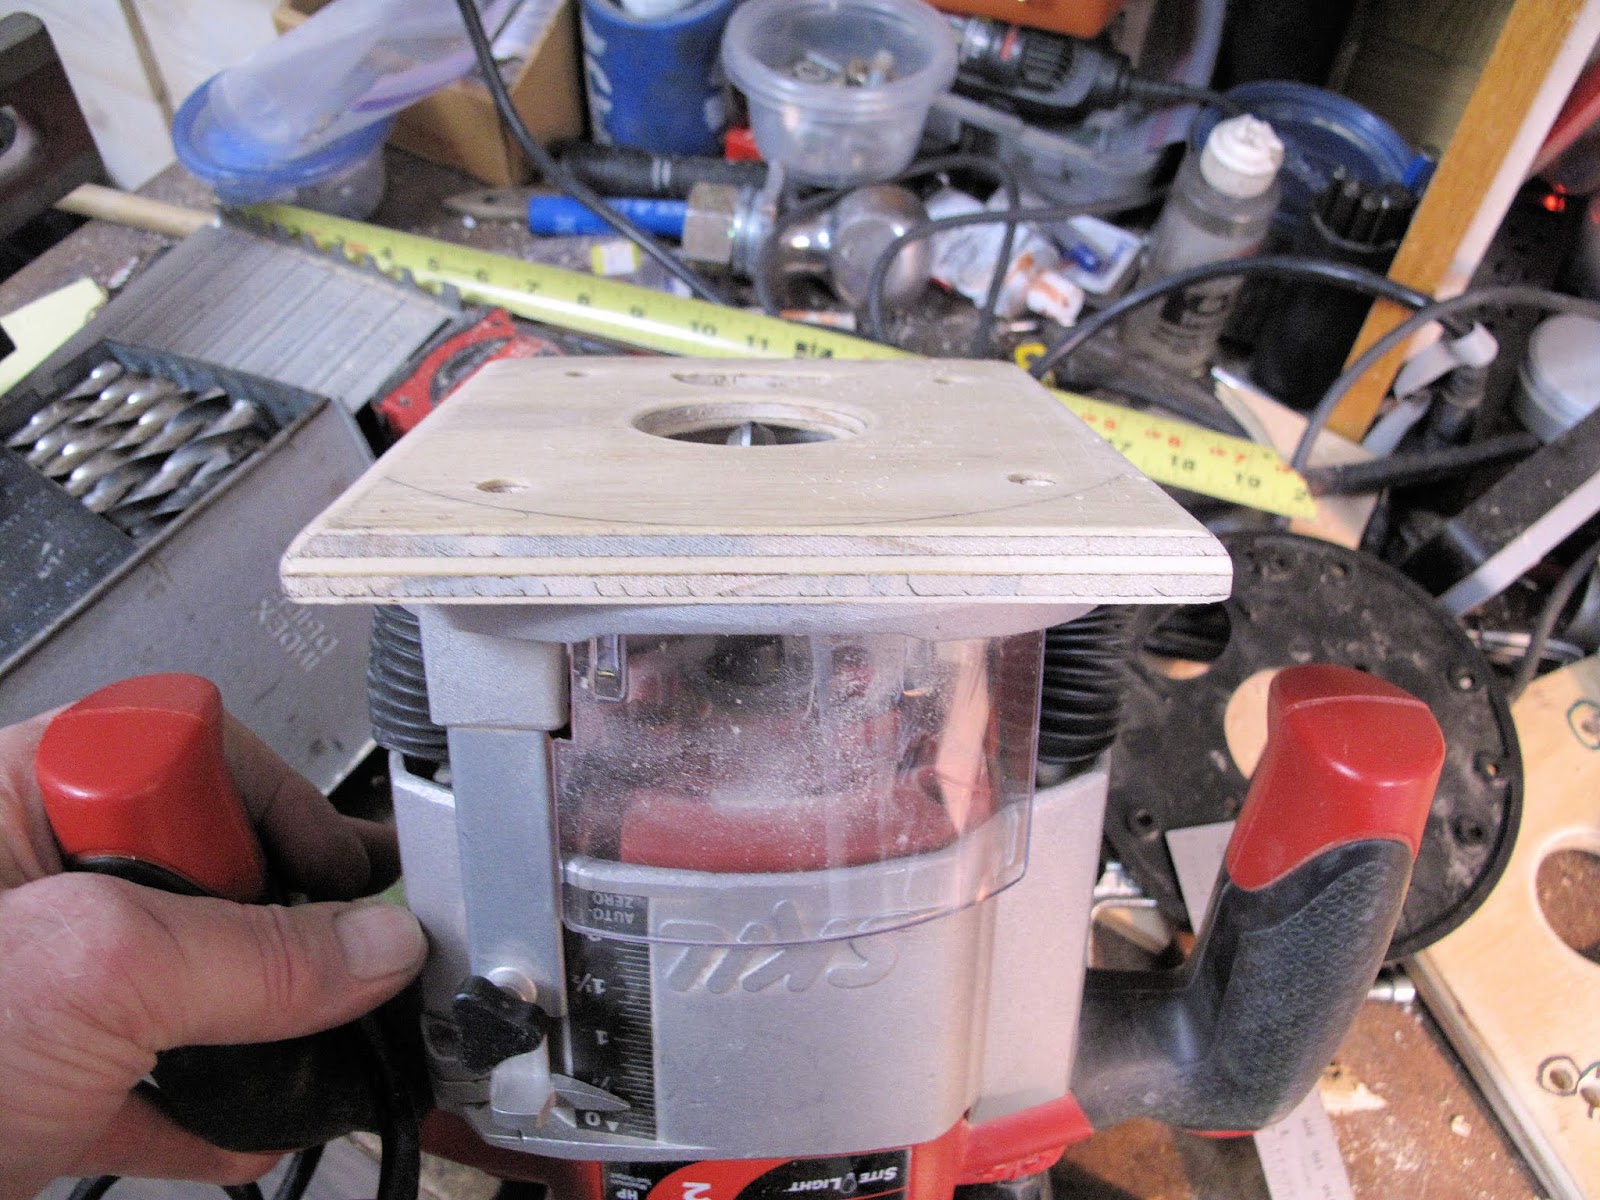
The first thing I need is some guides to control the width of the flanges. On the front spar the flanges are 9/16" wide. I've made some guides with a base of 3/4" plywood and rails screwed on, using 1" aluminum angle, 1/8" thick. The rails are positioned to allow the base of the router to follow them assuring a nice straight cut 9/16" from the edge of the spar. I've made these guides 24" long so I'll be doing the routing in about 2 foot sections. The front spar is easy in one sense, the out side shape is a rectangle, nice square sides.
I made the base for the router 6 1/2" wide, like the round plastic base. I should have made it 7" wide. When the router bit is at one edge of the flange the base is not resting on the other flange. I didn't remake the whole thing but instead work from the edges inward so I leave an island in the middle to support the base when working near the edges.
On the rear spar the lower face is square but the upper face is at an angle to match the curve of the upper stick in the rib.
I've made the guide for the upper face so both edges are tapered and you just use the edge appropriate to the face of the spar you're routing. In total I made 3 boards, 2 square and 1 with tapered edges. It's a matter of getting the width of the boards correct as well as the position of the rails to do all the combinations. I can always shave a little more off if needed or use some sticky notes as shims.
From my measurements of the old spars, the shaper cutter was about 6" in diameter. As a result when the cutter stops at an area which is not routed it makes a gentle transition back to the full thickness of the spar. I'm sure WACO didn't count on this for any extra strength but I wanted the ends of the routed areas to have this same 3" radius transition.
My idea is a little wacky but simple, build a ramp at the end of the routed area shaped so the router bit rises in a 3" radius as the edge of the router base rides up the ramp.
This was easy to layout in TurboCAD. I created a lot more points than the 3 positions of the router bit shown here and connected them with a splined curve. I then realized I could probably come very close to this curve with some radii, which would be easier for making my template. I was correct. My base is 6" wide with a 3/8" radius on each end. For the rear spars the 3/8" radius router bit extends 3/8" below the base, 1/4" for the front spars. For the first 45 degrees the template has a 1 3/4" radius and beyond that a 3" radius.
I thought I could make the base and then drill the screw holes in it. That almost worked except after 3 tries I still couldn't get it centered. It was always slightly off to one side.
Instead I started with an overly large piece of plywood, mounted it, then measured the distance to the edges. Then I trimmed it on the table saw until it was just at my lines.
I added an outlet for chips, like on the round plastic base.
I put the 3/8" radius on the 2 edges which ride up the ramp and waxed them with Carnuba wax, an old ShopSmith trick. It really helps.
I started making the ramp by making a template of the curve. The end of the belt sander worked nice to grind carefully to my line. The template has a line for the bottom but goes 1/2" past it so I didn't have to deal with a thin, delicate point.
I had some scraps of Ethafoam and thought I could saw it to leave a thin edge at the tip for a better start to the ramp.
The ramp curve was drawn with the template.
I used my metal cutting blade because it has more teeth and the slow speed wouldn't generate heat, the enemy of plastics. I made the ramp with three blocks of foam because that's the width foam I had. In the end it was easier to get good parts this way than sawing one tall piece.
Next I notched the bottom of the blocks so I could attach them to a piece of plywood, much easier to clamp to the spar.
I used double sided tape to assemble the blocks together and on to the plywood base.
The foam didn't let the router base slide easily so I coated it with glue, 2 coats, let it dry, gently sanded it on the end of the belt sander, and waxed it. I also coated the bottom of the foam to prevent the glue from causing it to curl up over time. I let each side dry before doing the next.
The side rails were a matter of getting the width sawed precisely and locating the rails precisely. One nice thing with the ShopSmith table saw is that you can square up the fence slightly wider than you want to cut your board and than move the saw blade using the drill press quill to a very exact cut.
I did a power off, trial fit using the old spars to make sure everything seemed to work.
Next I practiced on a scrap piece of wood. The idea is to start with an end cut, work toward the middle, move to the other end and again work toward the middle. I did both side of the test piece so the cuts were aligned on each side. We're ready to make some chips.
I found that to cut 1/4" deep I needed to use 2 drills 1/64" smaller to set the depth of cut.
To check the depth I set a 1/4" center drill in the cut and laid a scale across it. If light come through at the wood the depth is shallow. You want it so the scale just grazes the drill bit.
I also found that you should avoid moving the bit across the grain. It cuts deeper for some reason, not much, but you can see it. Always move as close to the direction of the grain as possible. It doesn't have to be perfectly smooth. Tiny ridges are easy to sand smooth for a nice finish.
Because of the length of my plywood base, the end of it needs to be about 9 7/16" from the start of the cut. I draw a line at 9 1/2" and set the block to start at 9 3/8". this allows me to always see my reference marks. It's annoying when they disappear under the edge and your no longer sure where you are.
Make sure you use a clamping block under the spar. Spruce is soft and easily dented with clamps, very tacky.
With the ramp block in place I make a couple test cuts then adjust the position to get the cut at the line.
The first cuts can be fairly rough, then smooth out the ridges. For the front spars cutting 1/4" deep I find I can take a cut about 1/4" wide then run back down the small ridge. At that point I'm ready for another pass in the direction so you are pushing the tip of the cutting edge into the wood.
You really can see just fine through the little window.
I also found an exception to my don't go across the grain rule. At the very edge of the cut make a final pass pulling the router toward you, so you can see better. It leaves a very straight, clean edge.
Once the end cut is done the long straight cut begins. I do this work setting on a stool so the 2 foot length is perfect for one sitting. I start at the edges then work in 1/4" cuts to the middle, leaving my little island for good support.
The trick to making easy straight passes is to rotate the router and use the corner of the base along the guide rail. Just don't run off the end of the rails. You don't want to ruin the spar.
Re-position the spar in the guides and repeat, starting at the end again.
At the tip of the spar WACO just ran the cutter off the end, see the first picture. I want the full thickness of the spar at the end to have more wood for attaching the tip bow. I could have ended the routing a few more inches from the tip. Instead I used a wedge of wood as a guide to get a nice straight edge on the taper.
The last and easiest step is sanding. I'm using 3 sanding blocks. First I use the small one with 36 grit to remove the tiny ridges left from the router bit. Next I use 80 grit to clean up from the 36 grit and then finish with 150 grit. I like using strips from sanding belts. They last for ever and don't clog as easily.
A finished spar ready to have the tip end cut to shape. I have 2 done, 6 more to go. The front spars have twice the area to route and are taking me just under 2 1/2 hours. I expect the 4 rear spars to take about 1 1/2 hours each, but they are cut 3/8" deep vs 1/4" on the front spars.
All very exciting.
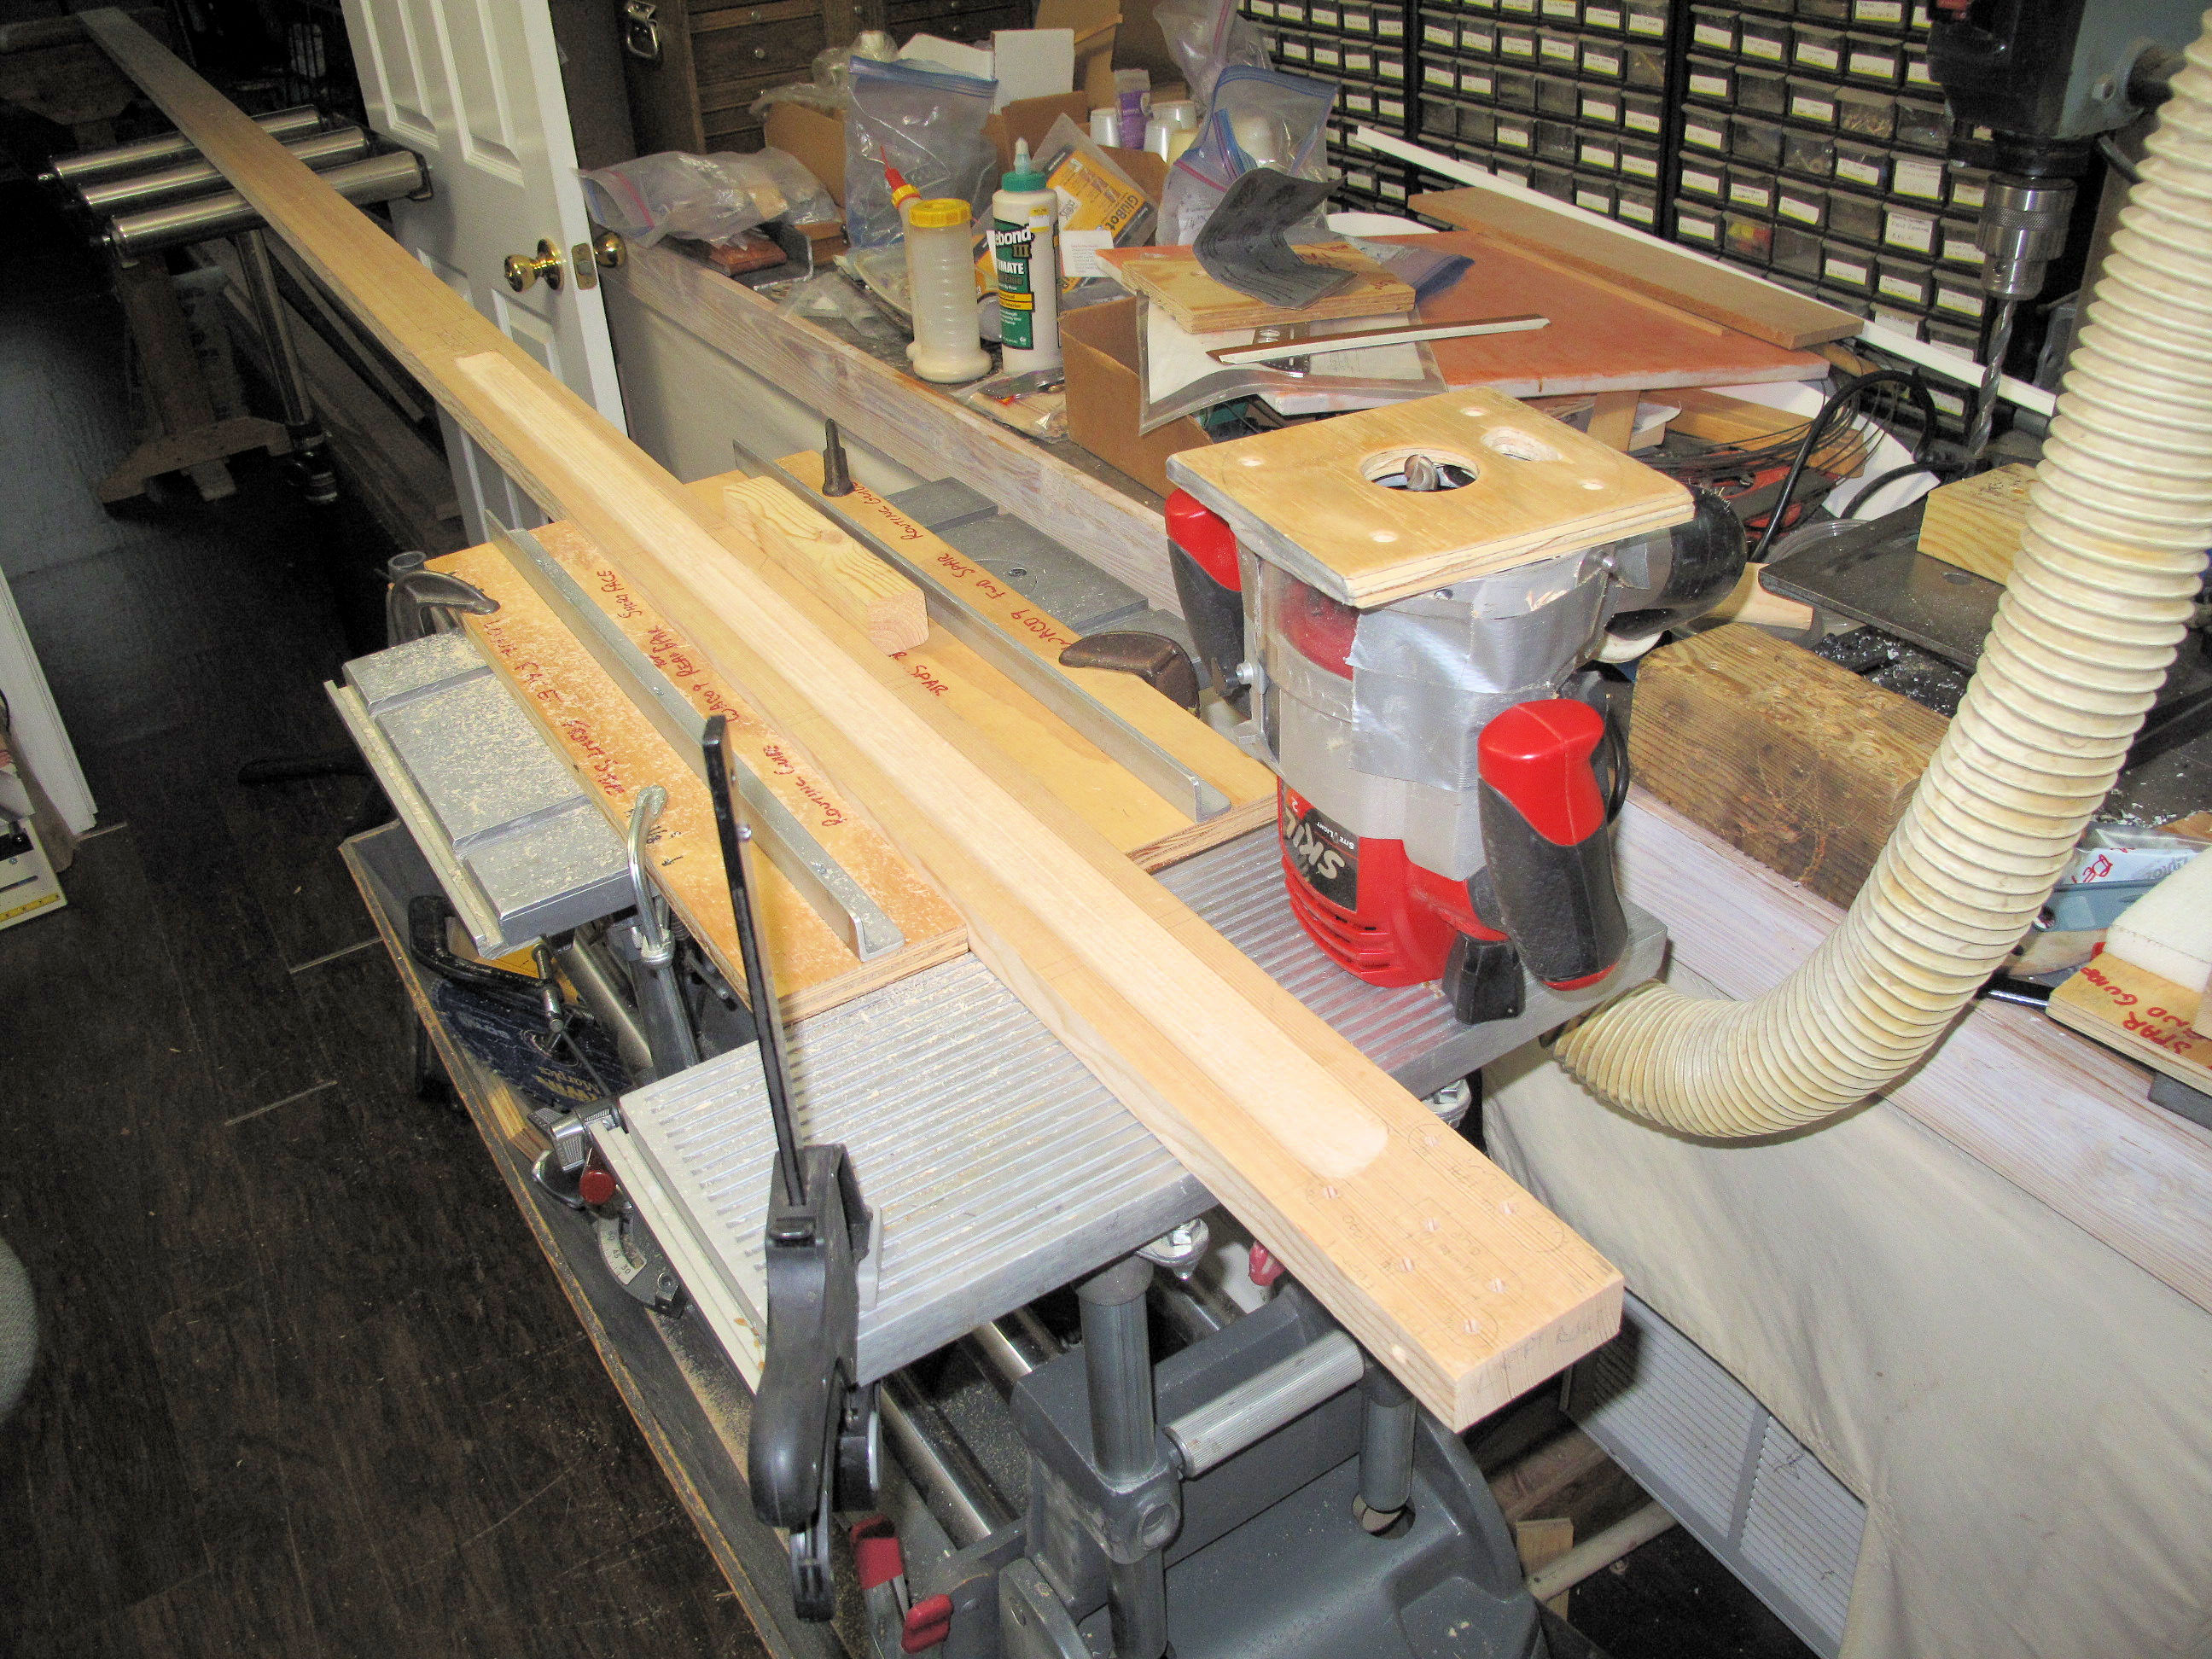


 The piece of 2x4 with the corners routed to 3/8" worked very well for sanding the rear spars.


 The last 2 spars are done. How cool is that?