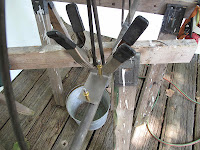
I decided after all these years to take a weekend off and just work on airplanes, no embroidery. The weather was forecast to be hot and fairly calm so a good weekend for welding. Because I'm using 4130 steel I still needed a place where I could work without any drafts. I set up one of the 10'x10' tents I use for selling embroidery at shows as a temporary welding booth. The side flaps zip completely shut. If you open some gaps at the top of the sides you get ventilation without the breeze. The side are so light the slightest breeze will move them. Early mornings and evenings were breeze free all weekend.
A variety of saw horses, clamps and hooks made of welding rod made positioning the parts fairly easy. There is a lot written about welding fuselages to prevent warping but I found nothing specifically on welding long flat tail surfaces. Fortunately the general principals apply. The best way to weld the stabilizer seemed to be to start welding in at the center rib and work outward 1 rib at a time on each side. The other thing is to weld the rib to both side of the spar before moving to the next joint. Luckily if you forget or the spars warp a little because they will, you can fix it fairly easy by heating the tube. You do this on the high (convex) side of the tube where you want to straighten it. In my case I heated the spar from the weld out about 3"-4" beside the rib. I heated it to a dull to bright cherry red along the to 1/3 of the spar and then let it cool. As it cools it pulls the spar back to straight. It was very cool to see it happen.
At each hinge strap there is a block of wood for attaching the fabric. To hold the blocks in place there are some clips (straps) which are held secure with a screw and nut. The clips are welded to the back of the spar.
Making the Hinge Block Clips (P/N 188) was easy. They're made from 1/2" strips of .050" steel 2" long. The first step was to punch a 3/16" hole for the screw. The hole was punched in the first part and then duplicated on the other parts.
I filed a radius on the inside edges of my sheet metal pliers for bending such parts. The bend was started 1 33/64" from the weld end. The square makes a nice gauge for setting the distance and getting the strip positioned square to the edge of the pliers. By holding the strip snug against a hard surface while forming the bend you get a nice tight bend.
I used a piece of scrap to make a little fixture to hold the spacing and clamp to the to control the location, centered 9" from the tip.
Welded on ready to be formed around the wood block. At this point I've spent about 16 hours welding the elevators and stabilizer after tack welding them. I've also use 16 lengths of welding rod. They probably wouldn't hire me at WACO but it was good fun and worth every minute spent in the tent in 80-90 degree weather. I'm just delighted.
Sunday, May 27, 2012
Subscribe to:
Post Comments (Atom)


No comments:
Post a Comment